Showing posts with label welding. Show all posts

Saturday, January 8, 2011

I Made a Shark (his name's Nibbles)

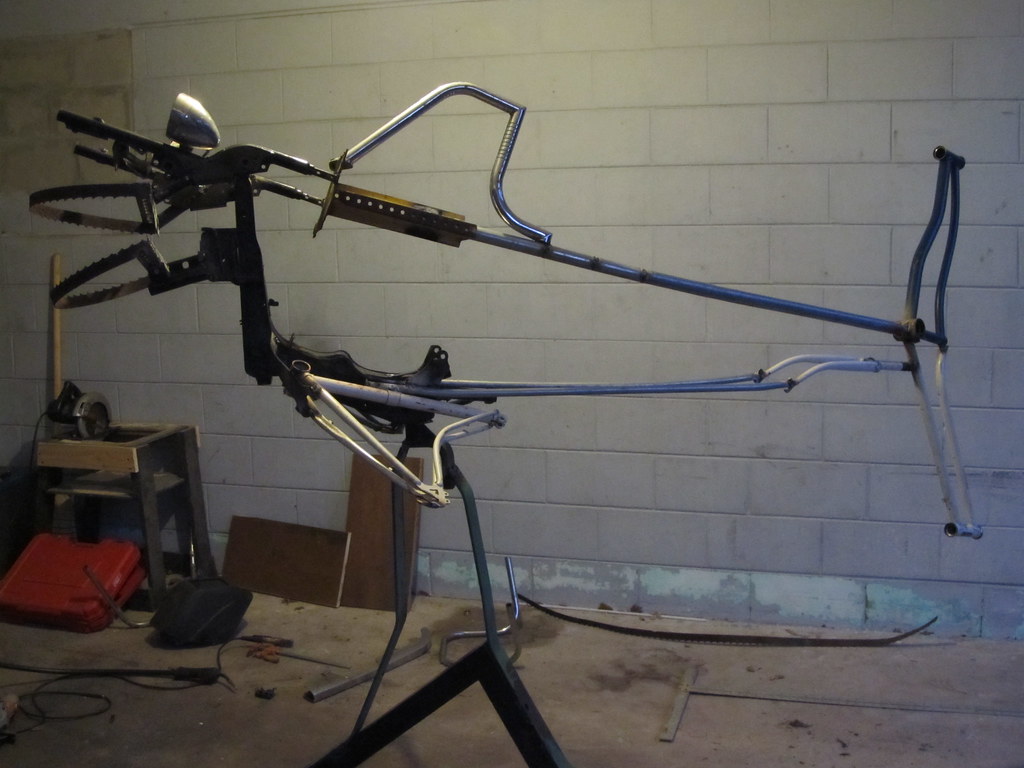
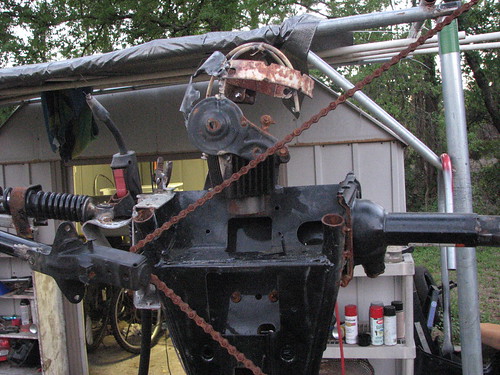
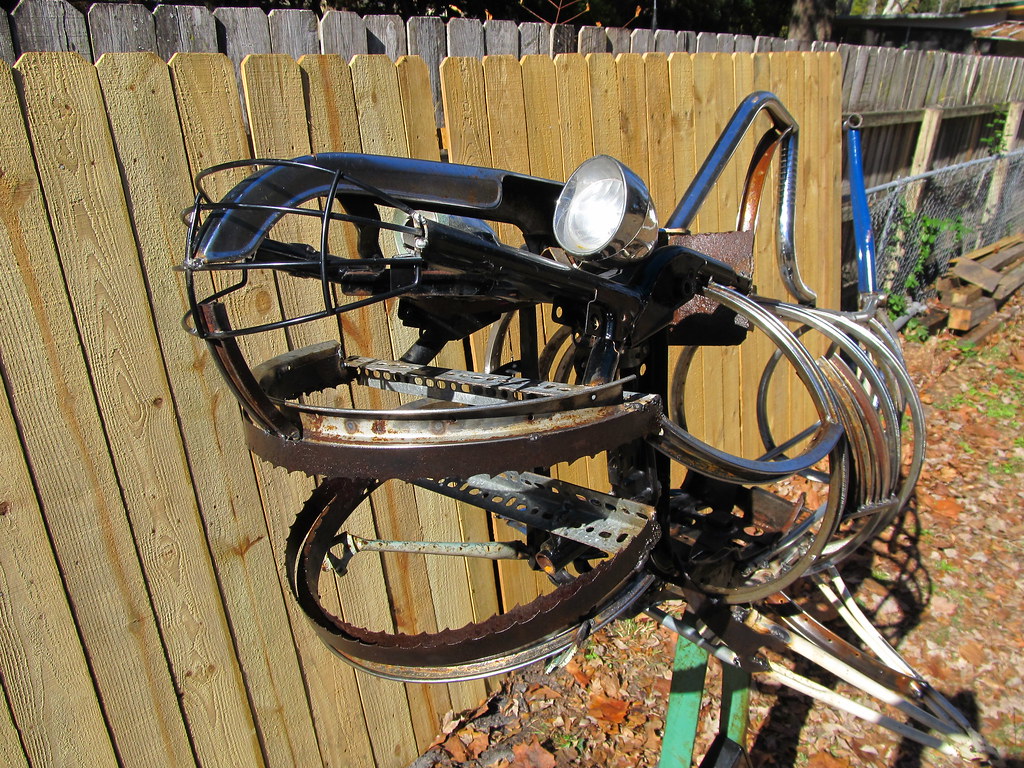
With the house being at a pretty stable place and having a space between the holidays and school/more house work starting back up I figured it'd be a good opportunity to make something new. I went and saw my friend Barbara after Christmas and among a bunch of other stuff she gave me there was a few chunks of a rusty old sawmill bandsaw blade which was screaming to be made into some teeth. We'd watched some of "Inside Nature's Giants" too, including an episode with a Great White, so when I grabbed a couple bits of blade that bowed into a D shape easily I knew a shark would be really nice to do with those blades.

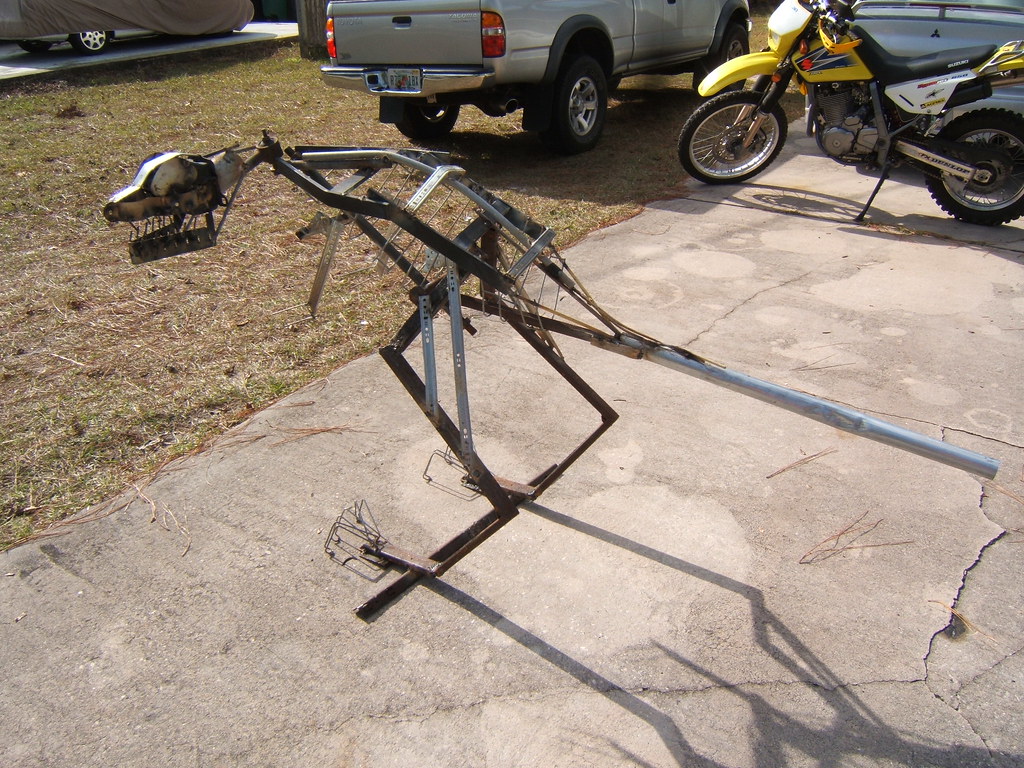
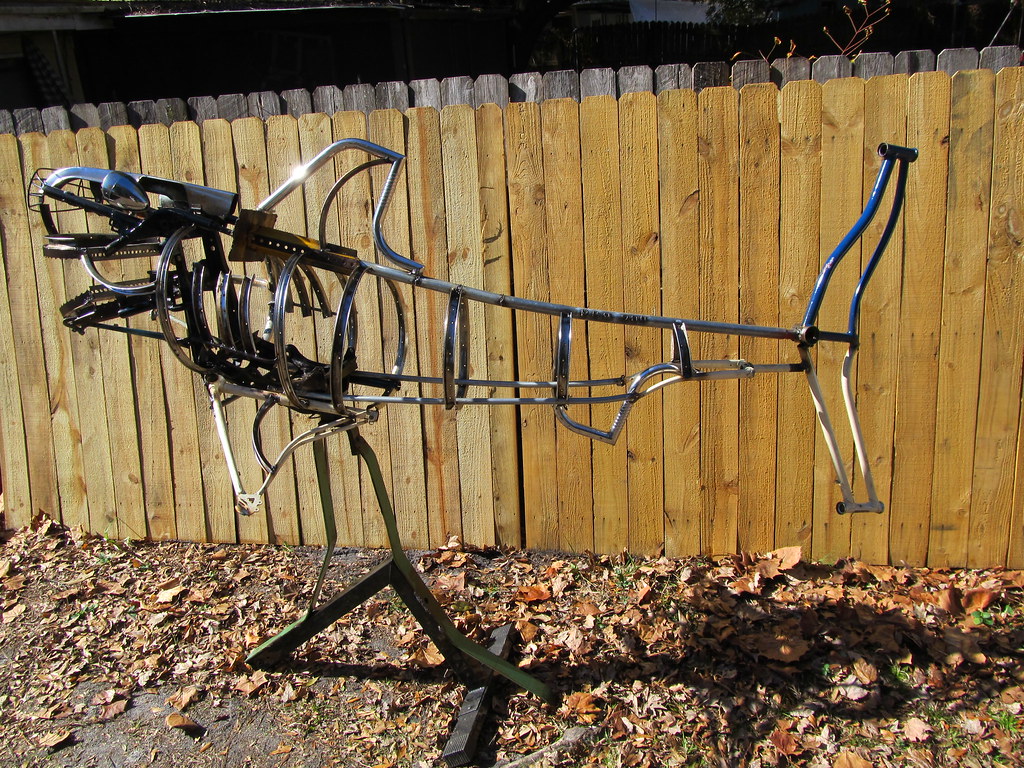
I cleared out a spot in the carport to lay out some scraps and see what might fit where. A couple of old ladie's bike frames seemed to have a good shape for a tail, a leftover hunk of motorcycle highway bar would make a fine dorsal fin, a conduit spine, and a couple chunky bits of motorcycle and scooter frame would make a good base for the chest and head.

Cut, bend, bang, clamp, and weld and the basic structure came outpretty easily. Also after I cut the bike frames to make the tail I realized how nice and similar the leftover frame chunks were to the shape and size I needed for pectoral fins. I only managed to hit my foot with a hammer twice in shaping them the rest of the way to where I needed them too.

Before going much farther I wanted to get the whole thing up in the air at the level you'd be looking at it from so I didn't wind up attaching something in a way that'd look fine on the ground and awkward at eye-level, so I went about making a square peg fit in a round hole. The scooter frame chunk was in about the center of the body and had a nice reinforced chunk of tubing that used to support the handlebars and floorboard on a scooter in a previous life, and I figured it'd work well as a sturdy pivot in it's current life. I also found out that this hole was just about the same size as a small hitch receiver which I no longer had any use for since I traded my trusty CR-V for a Tacoma a while back. I've never seen a square peg go in a round hole so well.

Now with the whole thing lifted in the air I put all the big fins in place and welded the top jaw up too. It was starting to look like a shark, but only from the side. Long-ways it only looked like a shark if you squinted and turned your head sideways, so I needed something to fatten up his cartilaginous bones. Rust-locked rims from a kid's bike looked just about right, but I didn't have enough to fill in everywhere I wanted to. I tried a local bike shop near my house to see if they had any similar wheels, but they only had aluminum ones. Then I tried the trusty rusty cycle shop near my dad's house since I needed to get a few things straight on my bike too and sure enough they had my bike right and a mess of small rims waiting for me before the evening was out.

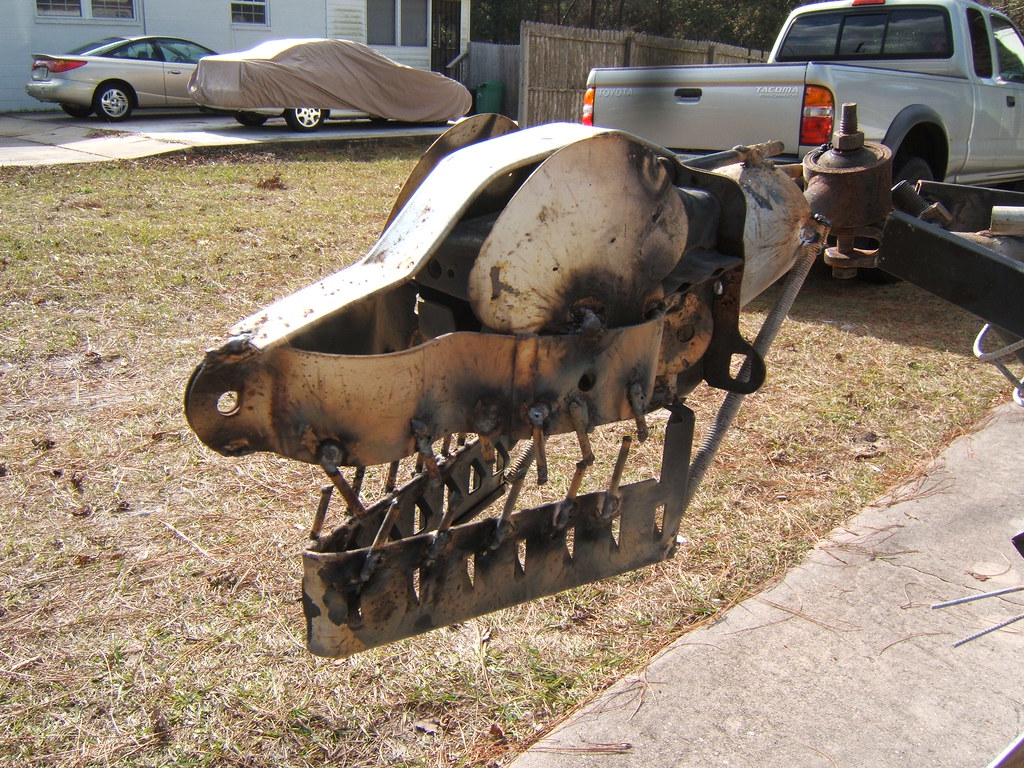
The next morning dad brought over a bunch of lumber and plywood for the new roof, so I had to retreat to the back yard to work on the shark. The rims worked out great to fill in the body and give him some shape, but I was still worried about how I'd make the nose and head work out. My scrap pile is already on the skimpy side since the move, but it always seems to have something tasty and just right for what I need if I kick it just right. Turns out football helmet face guard + motorcycle chain guard = shark nose.

After that it was pretty close to done, so I added the last bit of highway bar as a back fin, another row of teeth, and a few other little bits to complete it. Since the archer looked so much better and felt so much more done once I wire-wheeled and clear coated him, I did the same for Nibbles. I made sure to go thick on the teeth, and that bandsaw blade feels nice and slick now. Can't wait to do some more stuff and see when I can go hopefully clog up the art walk again.
Saturday, July 24, 2010

I Made a Catapult


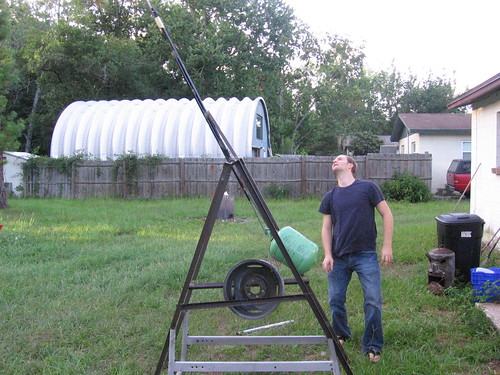
One more thing to check off my bucket list, I now have both made and fired a piece of siege weaponry. A trebuchet to be exact. A couple of bed frames, bits of channel stock, a dirt bike chain, freon tank filled with water, an old rim, and some parts from a treadmill. The arm is on a ball bearing pivot and flings things ever so smoothly. The farthest shot thus far is about 60ft, but I'm hoping to improve that with a proper sling and a couple of heavy old batteries for the counterweight as soon as I get some from work. It's still a work in progress, but it's pretty awesome even as it sits now at roughly 12ft tall. Once I get it really tuned up maybe I'll post some videos. You can also see Mighty King Tiki Toki Tookie behind me too.

EDIT: I've vastly improved it with two large truck batteries for a counterweight and a sling instead of a simple hook. It now slings objects about 150ft. Also, BRIGHT GREEN!

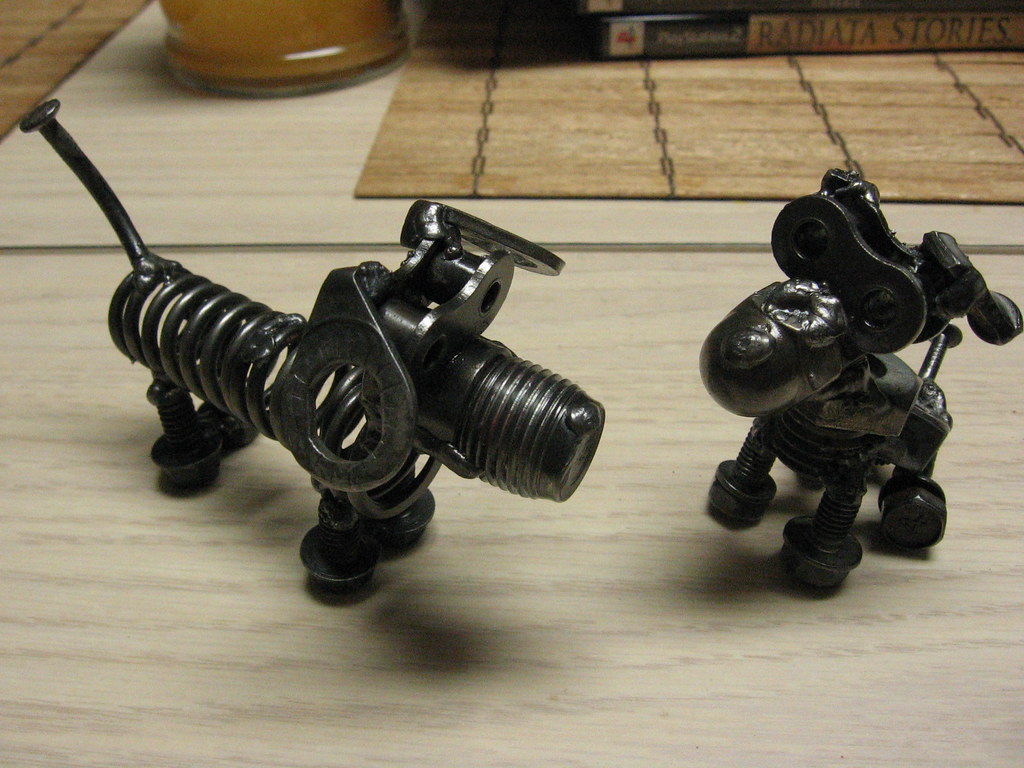
I Made Dogs


Nuts and bolts dogs, made the same way I do the model motorcycles. Burnt my left index finger pretty well on one of them. Springs are very hard to weld without melting them and I'm amazed it was so hard to find 8 matching bolts of the right size when I have so many that are all very close.

Wednesday, June 23, 2010

I Made a Bigger Motor Fit

Got a new toy recently on craigslist. A Chinese clone of a Honda SS50 that hadn't been run for over a year and had a broken sprocket hub on the rear wheel, but was all still intact otherwise.

I got it home, got it to start roughly just on the old gas left in it, and called it a night. The next day I went to the local motorcycle junkyard CycoCycle, and managed to scrounge up a close match to my broken hub, only it was cast with about twice the aluminum and looked much sturdier. After getting it fitted and installed I managed a shaky and sputtery ride around the yard with the motor jumping around under my feet.

One cleaned carb, properly replaced engine anchor bolt, fresh oil, a newly fabricated chain tensioner, fresh gas, a new fuse, cleaned fuse holder, and a new battery, and I had it running..... WORSE. Actually it was running much better, but I'd managed to lose the carb settings while cleaning it, and couldn't manage to get it idling properly. It would get up to 40MPH without trouble, but that's all it had. Not bad for about $150 invested in it including gas and oil, but I was wanting more and not wanting to mess with tuning a carburetor if I could help it.

I went online to Planetminis.com and found a nice looking 110cc motor that looked like just the trick and got it for a decent price with the carb and all pulled right off a running bike. A few days later I dropped the original motor and heaved the heftier 110 in place. Then all I lacked was finishing.

Finishing turned out to be a little more involved than I originally planned for. I had to rewire the stator plug from the original (my cheapo 12v impact wrench was fantastic for this), pulling the flywheel to make sure I matched the correct wires to the original plug. I then installed a fuel cutoff valve since the original was MIA, swapped the original motor's drive sprocket on, installed the throttle cable, and was then struck with some problems:

* No spark
* Clutch cable won't reach on new motor
* Mounting bracket hole for muffler doesn't line up
* Foot pegs won't fit between bigger motor and exhaust pipe

I wound up having to figure out the pinout for the gear indicator light, which also acted as a kill switch if the bike wasn't in Neutral when kicked over. After that was sorted I just wired the N pin to ground and wrote "ON" over the neutral light. Now I won't forget the key in there! :P

The clutch cable wasn't too hard to fix. It would have had the same amount of travel even with the right cable, it just needed to be a couple inches longer. After sizing up the situation I ground a notch in the side of a bolt, welded a nail to it, and slipped it in place between clutch arm and clutch cable. Works perfectly!

The muffler mount just needed a notch cut in it so it could slide far enough forward to meet up with the slightly longer motor and still meet up with the bracket's bolt hole.

The foot peg was a serious pain. After trying to shave down some meat to make it fit for about an hour so I wouldn't lose the proper positioning of the peg I gave up, lopped the original right peg off before it bowed up to hit the motor, and welded a new bit of steel rod sticking out while it was all bolted in place so I knew it'd have to fit cursing and burning myself with the welder the whole way. I then eyeballed the foot peg and welded it in place, putting solid beads in with it all in my vice so I wouldn't have to curse and burn myself as much. After that it slides in place great through.

Now on a test run through the neighborhood I can get it up to 50 and I'm guessing it'll make it between 55 and 58 on the open road. Once I toss an air filter on there I'm not sure if I'll sell it or keep it around and put new tires on it. It's very fun to drive and is nimble enough to almost treat like a dirt bike.

Monday, May 10, 2010

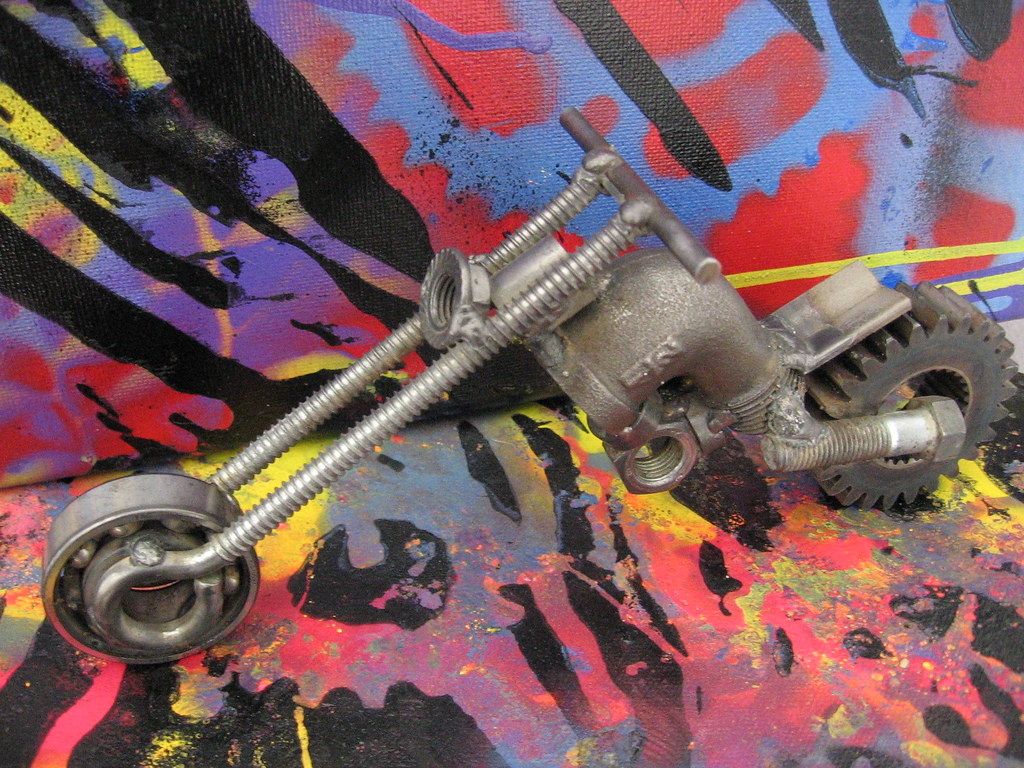
I Made Motorcycles

Well, a model of a motorcycle anyway. Gears, a ball bearing, and some various hardware bits combined to make this fine little bike. I forgot to add foot pegs and exhaust pipes, but I may go back and do that. To give credit where credit's due, I got the idea from these guys in Thailand. They're really talented. It's about 20cm (8") long.

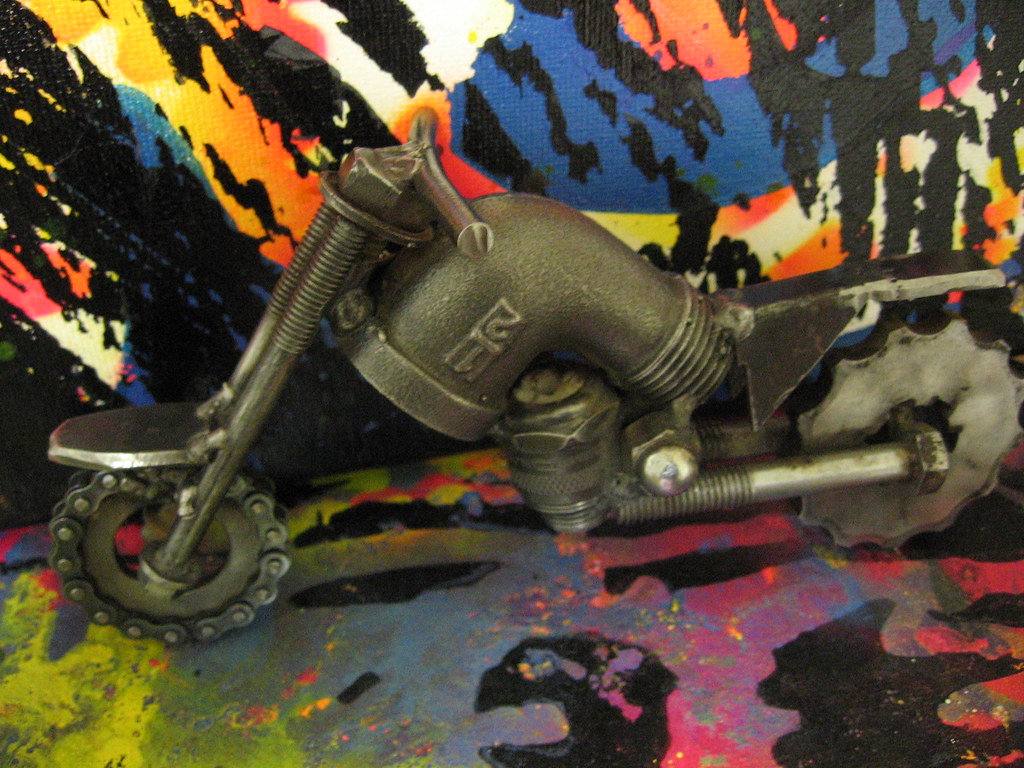
Edit: Made this one too.

Thursday, April 8, 2010

I Made an Archer


It's been a long while since I got my welder and since then I've gotten a good deal better at using it and know what works well with. I've also gotten my scrap pile back up in size and there's been some nice goodies on it from sources as different as the woods behind my house and the local Harley Davidson dealership. Three of the best pieces to it were a pair of slightly scraped up exhaust pipes and a chunk of a motorcycle frame that reminded me of a slender torso.

I'd been thinking about getting a decent bow and arrow set to practice and get some stress off with, and with a pair of pipes that looked like a set of legs and a chunk of frame that looked rather like a fit chest, I decided that those and some motorcycle handlebars could be used to make a nice sculpture of an archer. I figured a human figure would be pretty cool to make and since I just so happen to be in such a shape myself I also had a decent pattern to go on too. As I was making it there were countless little moments I'd check the angles and shapes of things I'd done against how I'd do them myself. This photo of myself (taken by Bri Miller) was actually very useful in getting the positions of the arms right. I hadn't realized the drawing arm was basically turned upside down before seeing myself doing it.

As with the dinosaur, I started from the feet and worked my way up. The feet are made of hardware from a garage door with their angles and positioning modeled with my own as a rough reference. The left arm is a truck jack, and the right arm uses a small shock absorber to spring back and hold tension on the bicycle chain that is the bowstring.

The head was easily the most difficult part to make. I didn't have anything that already looked something like a head, so I had to find all sorts of little bits and burn my hands holding them in place while I tacked them together. having on welding gloves made it too awkward to not let some parts slip. I especially like the way the eyes came out. One is part of a bicycle's crank and the other is a ball joint from a car's steering rack.

The fingers were all made from motorcycle chain. #420 for fingers and #428 for the thumbs. The arrow head was the only part made from plain stock specifically to look like it does.

When it was all said and done, I moved the archer off of the temporary wooden base I made for him and welded up a steel base made of railroad tie plates my friend Barbra gave me and an old motorcycle highway bar with a nice twist in it. I also ran over the whole archer with a wire wheel to get the bulk of it's rust off and sprayed it all down with some gloss clear coat. He's looking pretty snazzy in the front yard now taking aim at passing cars, bikes, and one bright orange dinosaur.

Barbra also came by to see the archer and take some very nice photos of it just after the first sun-shower of the year. The first photo of this post is one of hers in face. They came out very nicely and you should definitely check out those any other stuff of hers here ,here ,and here. She also did a nice backdropped photo of my orange dinosaur here.

Wednesday, January 7, 2009

I Made a Dinosaur


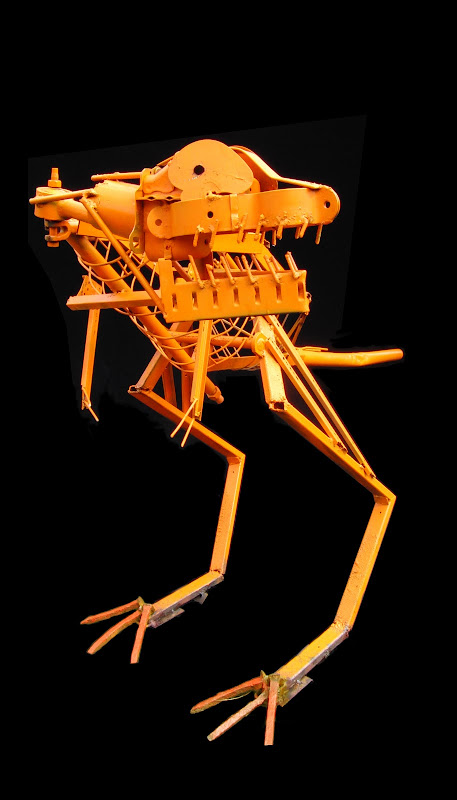
After getting pretty decent with a welder, and seeing my scrap pile behind the shed grow large enough to support making something interesting, I set about making something from the cornucopia of scrap steel I'd collected.

I had a rough idea of a bipedal dinosaur or dragon in mind, but no specific plan or places for pieces in mind (points for alliteration?). I began with the legs, using the welder to very inefficiently cut the metal that would become the legs, then welded the feet to the base, held the ankle/lower legs in place, and tacked them down. Then I did the same for the femurs. I added the back right over the legs, then worked on the basic back outline, adding reinforcements to the tack welds and making sure to keep the whole thing balanced.

Once I had the basic body shape done, I started adding more detail like the ribs, toe claws, and leg pieces. To shape the curve of the tail, spine, and other larger parts, I simply beat dents into strategic parts of the piece, then hit it on a tree to get the curve I needed, which wasn't a very forgiving process on the hands even in welding gloves. While doing all the welding and grinding on paint and rust I got plenty of odd and scared looks from the rabbits in their pen.

I then needed to decide how to make the head and whether to make a dragon's wings or a dinosaur's arms. Since my stockpile was getting somewhat puny I decided to go for the latter, using drawer rails with locking latches to give the arms some range of motion. Then I began working on the head.

The head consists of some steering linkage, a bumper mount from, a rack-mountable spacer for the lower jaw, pieces from a lawn-ornament of a happy little man that had wound up on my neighbor's trash, and some political sign supports for teeth along with other bits of scrap. The tilt of the piece the head bolts to makes it lean to the left, which looks good with the rest of the t-rex's posture. After riding around for a couple days with it strapped into the bed of my truck I'm not sure what to do with it, so it stands guard at the front door for now.

EDIT 4-17-10:
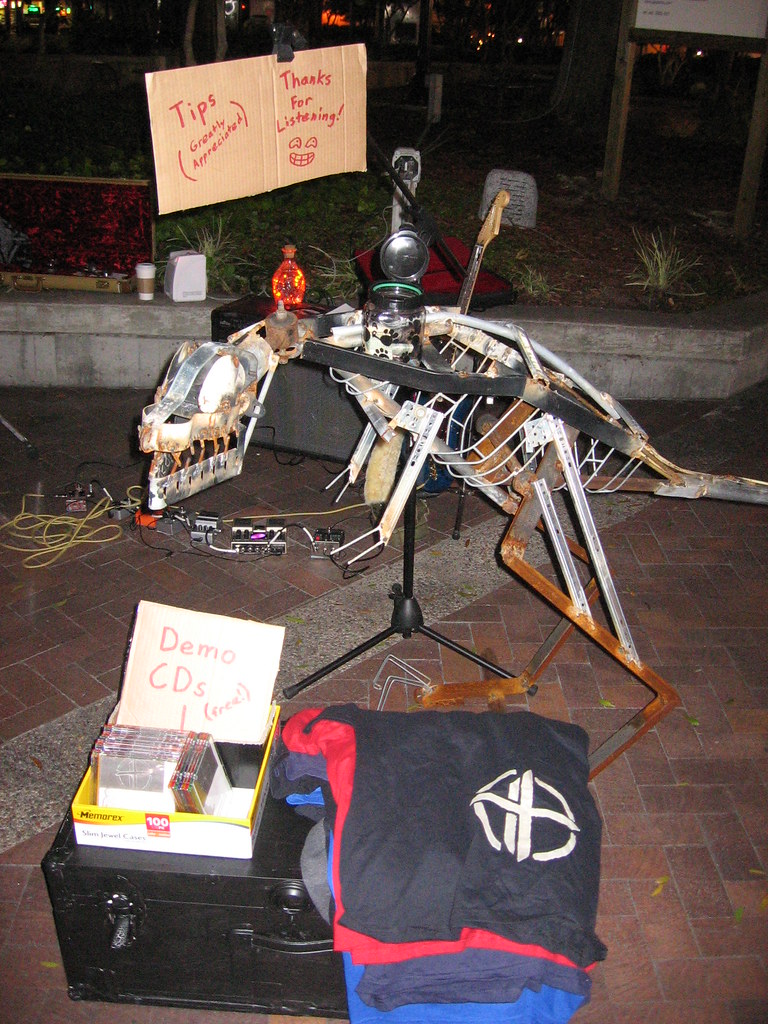
Since making him, the steel dinosaur has seen music and art, and has also had a few color changes. Daniel and the guys of the band Anderdown (of which I was part at the time) brought "ROFL-saurus" to a show at Jacksonville's downtown art walk when we played. ROFL-saurus may have gotten more compliments than the music.

Some time after that I painted him brown and black to keep him from rusting too badly, but when Halloween came along I decided it was time for a more seasonal color. BRIGHT ORANGE! He had a few problems with the toes being too thin and breaking off, so recently as I was working on the archer my friend Barbara brought me some railroad spikes and tie plates. The spikes worked out great for new super-sturdy toes and with a fresh lick of orange pain to match things up ROFL-saurus is gracing the front yard, being stalked by the ever-steady aim of the archer and getting funny looks from the neighbors. Barbara was even awesome enough to come take and put together some nicely backdropped photos photos of the archer and dinosaur.

Sunday, November 30, 2008

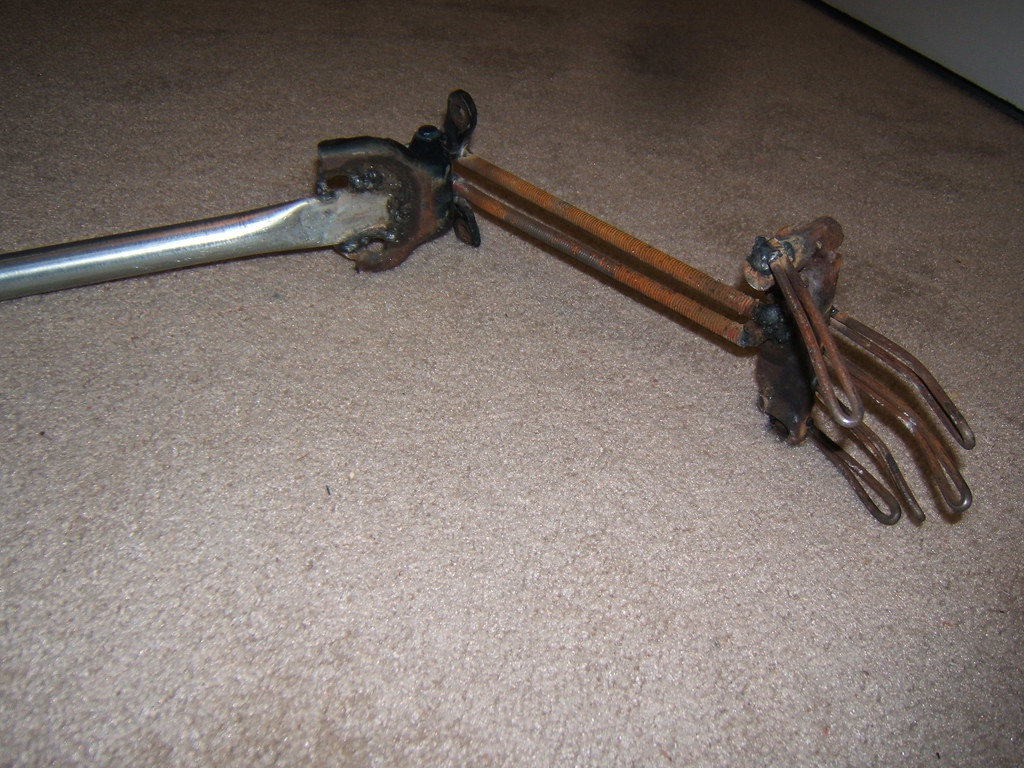
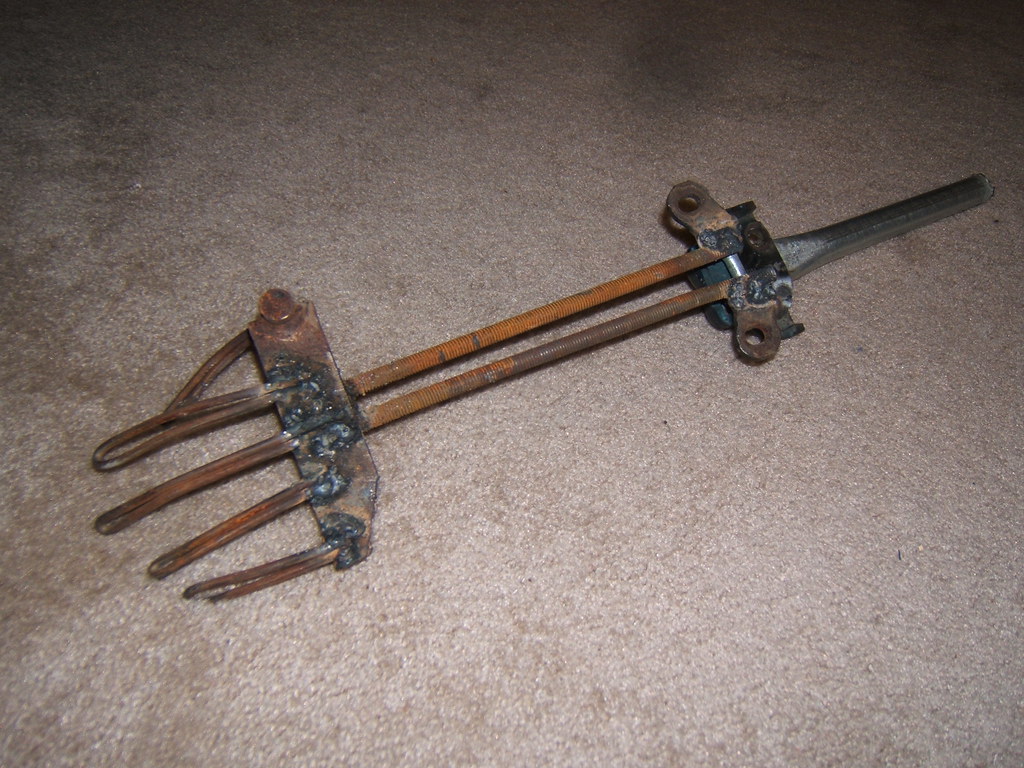
I Made Metal Stick to Metal

I decided to give my new welder a go recently. It's a
small 110v flux-core wire welder and it's pretty handy for anything under 1/4". Anyway, after my dad giving me his old spare set of welding gloves and an old welding mask I struck some arcs and gave it a go.

A few years ago dad had me try welding on a small trailer that needed some work. The results were a "porcupine" of welding wire as he put it, so I figured I'd have to do better this time. After getting a feel for making a few beads on a piece of scrap and burning my name through a piece of thin sheet metal, I decided to try something more substantial. Taking a pile of steel scrap I had around, I fashioned it into an arm that moves at the elbow. While half-way through working on it my roommate ordered pizza and I had to go sign for the it. The delivery guy almost fell over when I walked up with the mask, welding jacket, and one glove still on.

I also made a small metal bracket from some political yard sign metal (the same as the fingers on the arm) for my room mate so his new air filter can bolt up properly and not wear holes int itself. it's pretty much just a rod with a loop on each end welded so a bold could go through.

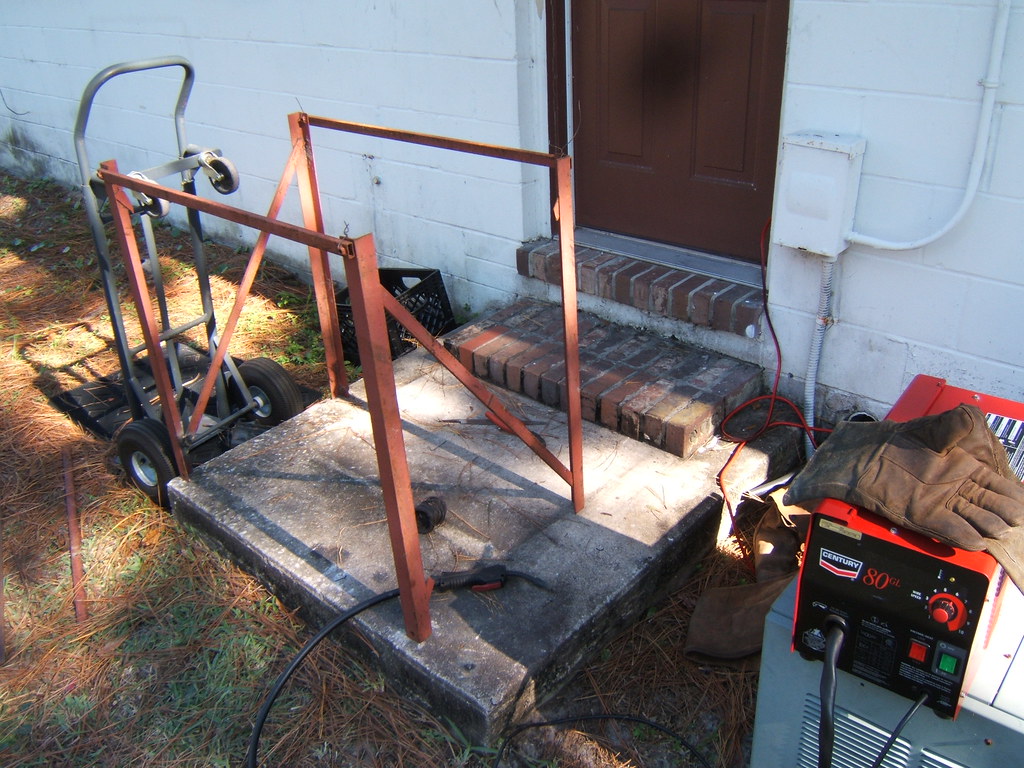
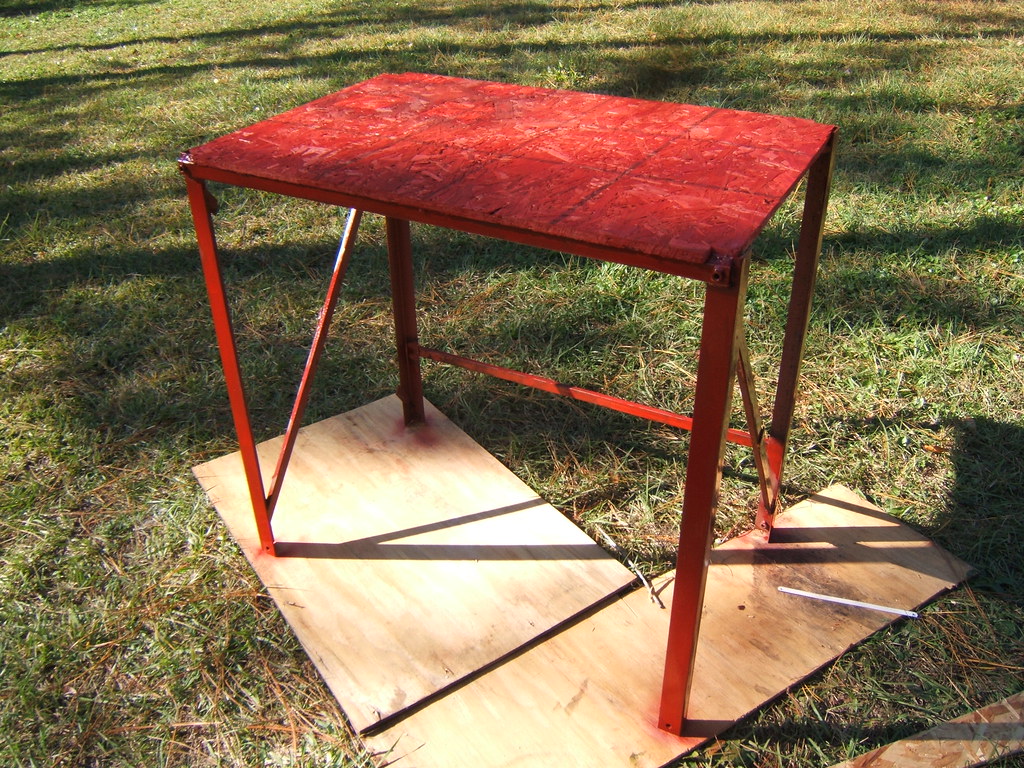
Once I'd finished the arm and bracket I felt more confident with my welds not falling apart, so I gave a shot at making a work bench. It's made of some metal shipping crate frame that I held together with baling wire while I tacked it together. It's pretty self explanatory to look at it, and sits pretty solidly, but I wish I'd had a magnetic square, as the corners are nowhere near square. Ohh well, it'll still work nicely. The table top is just chipboard and I painted the whole thing so it won't rust or peel too badly. I'm probably going to make it so I can bolt my Skil-Saw to it and use it as a table saw. I'd also like to get a vice mounted to it as well. At the moment the whole thing is just holding up my

Fixing a Targano Digital Microscope

 Tip for  It takes a microscope to fix a microscope. At work we have some Targano brand digital microscopes. They work well, and make a very...