Sunday, August 31, 2008

I made up a story


This is pretty much a filler post, but something of an insight to how I process things in my head as I make them.

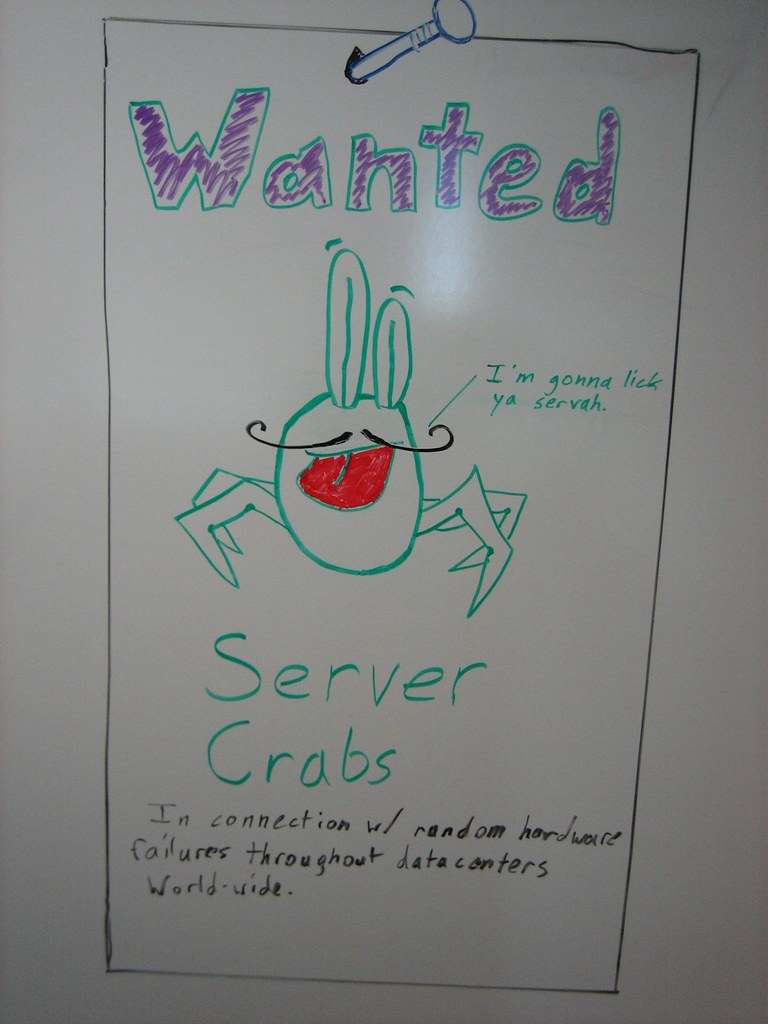
I was bored at work yesterday and saw a half-erased squiggle on the white board. I noticed the squiggles looked like a set of eyes and a large tongue, so I drew out what I saw more clearly, giving them more definition with the tongue crease and the outlines of the eyes. Then I needed to give the face a head. The eyes were too long to make a decent head, so I left them as stalks above the head. I didn't want to draw a body since I was just doodleing so I added arthopod legs to the sides of the head. It looked like a crab with no claws now.

I wanted to leave the crab there for all my coworkers to see on Monday, but the crab needed a reason to be there, so I decided that he must be a server crab since I work at a datacenter (where a lot companies run their servers from, it's kinda where the internet lives) so I labeled him as such. I then wondered what it is that a server crab might do. Since he didn't look like he could manage much aside from licking things it seemed obvious that server crabs must be quite adept at licking server. This presents a problem though, since valuable electronics that have to run all the time and saliva all over said electronics wouldn't go well together.

I decided that the server crab was a wanted man (a wanted crab?). I added a quote and a wanted sign above his head, then came up with the notice below. I also figured that if the server crab was on a wanted poster, he must have facial hair befitting a fugitive, so he got a pencil moustache. Then with the addition of a border to the poster and a nail to hold it in place the poster was more or less done.

I've added a better description today "Wanted in connnection with saliva-related hardware failures in datacenters world-wide. Should be approached with caution and a bowl of melted butter." and added $10,000 below that.

Thursday, August 14, 2008

I made a shelf out of wine bottles


On Instructables, I found a project someone had made where they used turn buckles and wine bottles to make shelves. The other day I saw someone on Craigslist giving away a case of empty wine bottles. Can you guess where those two ideas met up?

I got the bottles, and they turned out to be from all manner of vineyards. There turned out to be enough matching bottles for one shelf, and when I snagged a couple extra bottles from the house I had enough for two shelves. I got the cheapest non-plywood plank wood I could get, which is an odd finger jointed composite wood which looks like it was made from all the scraps with knots in it. For half the price of pieces made the same way with fewer knots and 1/4 to 1/8 the price of solid planks I figured I'd give it a go. I matched the bottles and cleaned off the labels first. I think some labels had a water soluble glue, while others a different glue since some came off easily with hot water and for others I needed to use gas to get the adhesive off the bottle. Then I got to work on the wood.

After ripping the 16" planks to 8" I added recesses for the tip of each bottle to sit into the shelf above it. I also put in two holes for the eye bolts to go trough just off center on each side of each plank. After test fitting it all, I took it apart, cut some small plywood feet to keep the bottom nut and bolt from touching the floor, screwed them in place, sanded, and stained all the wood.

Also along the way I managed to break one of the bottles I needed, so I had to go get more wine to finish the project. It turns out Barefoot wine is pretty good. It also turns out that working with tools while tipsy on a half bottle of wine is pretty fun. Good thing I had other bottles around to put the rest in, I wasn't feeling like working with tools while glassy-eyed.

Bada-bing, bada-boom and I have wine-bottle shelves. I might still add a third bottle height to it, but I need to get four more matching bottles. If you plan to do this yourself, go with more solid wood since I think the wood I used being under the stress this puts it in may wind up weakening the glue joints over time. We'll see how that goes. You can also forgoe the turn buckles and just use some small chain since I just wound up using the eye bolts to tighten the whole shebang down anyway. Also try to make sure that your bottles come from the same brand and type since very small differences in the bottle height can wind up as less-than-tightly held bottles in the shelves. Just use it as an excuse to buy a case of wine I guess. Just remember not to drink the case before making the shelves. Recruit friends if need be.

There are plenty of photos over on flickr of the construction. I'll add some of them here later, after I figure out where the heck to put this shelf....

Thursday, August 7, 2008

I made a cooler usable again


Sometimes when I'm scooting around on the ugly scootling I come across things I can't pass up. A few days ago I found a large dirty, and broken Igloo cooler. My dad has a couple of these and they're great for long trips or parties. While I can use his when I need one, as I passed this one waiting for garbage pickup I decided I could use one for myself. It's probably one of the largest coolers Igloo makes, and with the lid trying to fall off, I loaded it onto the passenger seat, threw and arm over it and putted unsteadily back to the house, gathering more than a couple funny looks for having a cooler as long as the scooter itself with me.

Once I got it back to the house I cleaned it up some. Dried fish goo and dirt were caked inside and out so I scoured it with Comet after taking all the hardware off. Next was to find a way to fix the broken parts on it.

When I looked on Igloo's website they wanted 15 dollars for a "cooler repair kit". This includes a set of plastic hinges, clasps for the front, and some other odds and ends. The problem with these are the same as why this cooler was in the trash. They break reliably within a year or two since the hinging is just flexing plastic. I decided to use some chrome steel hinges for 99c a pack from the local hardware store. There was also the problem of keeping it closed but I decided to simply forgoe the clasps since the lid is heavy enough to hold itself shut mostly. The handle areas were cracked, and looked like they might not hold up too well under weight, so I used some 2 part epoxy and JB Weld (JB Quik actually) to reinforce those areas and to keep water out of the foam inside. I may have sealed in some sugar ants as well. Since the drain cap was MIA I went looking for a plug for the hole. A cork from a bottle of Hana Sake did the trick nicely. The last problem was the strap inside that keeps the lid from flopping back. That was an easy fix. Cut off the broken part and put a new hole in it. Good as new.

There were a couple things that I tried that didn't work like I wanted. I tried to use a window clasp where the normal clasp was, but the plastic is soft enough that a good pull would pop it open. I also tried to replace the strap inside with a piece of bike inner tube, but the rubber was too stretchy and didn't work.

After that, I stenciled on my name the lid since my dad's cooler is so similar to mine. Wouldn't want him to accidently lay claim to it. ;) I'm gonna take it out today with some friends to a dirt bike track and give it a good test.


Update 1:

Took the cooler out, it works as expected, except the handles were both on the virge of coming off the whole time. I replaced the screws with some bolts going clean through to the inside. It's not the prettiest solution, but I'd rather not have a heavy cooler fall on my toe again....