Showing posts with label metal. Show all posts

Saturday, January 8, 2011

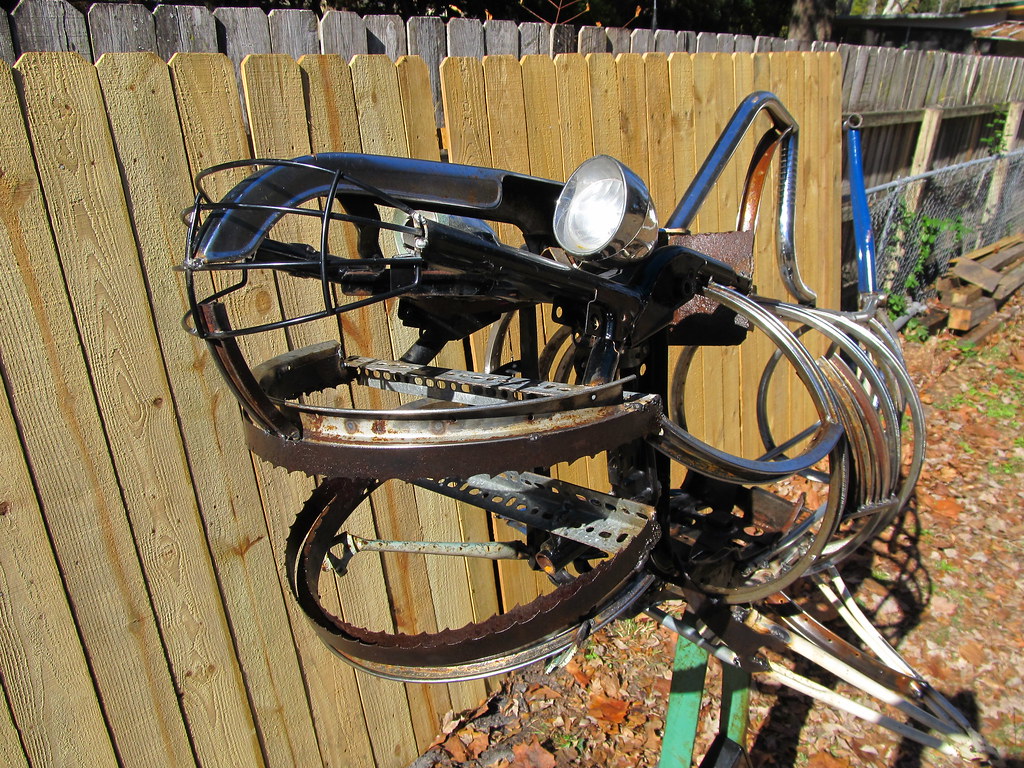
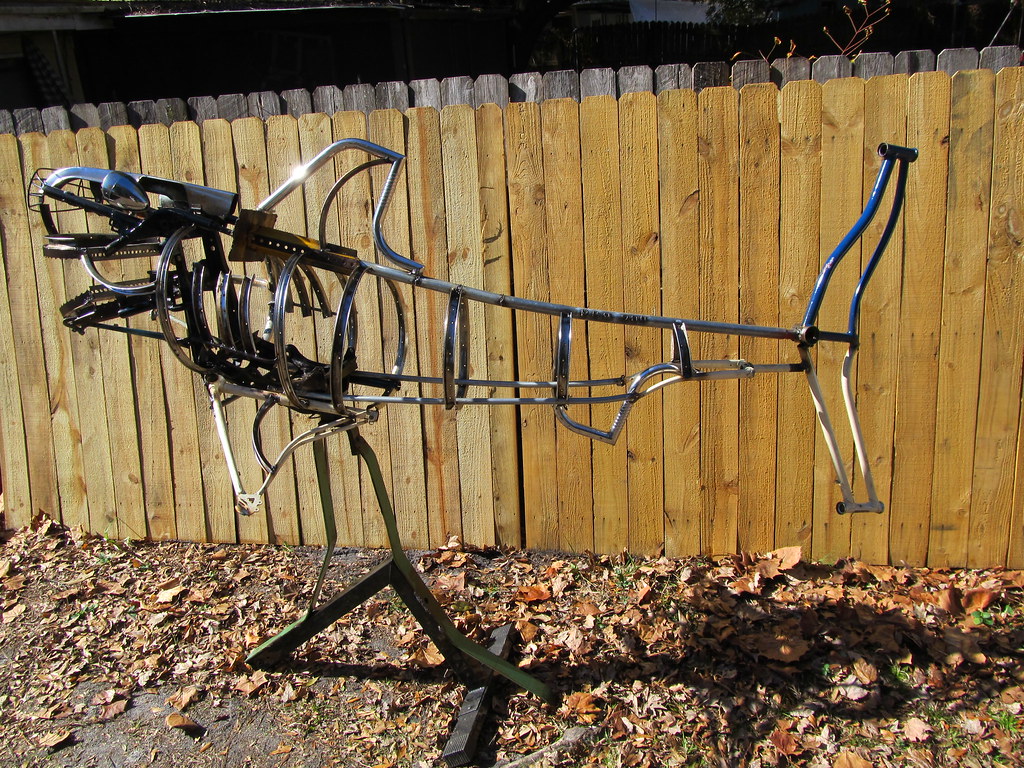
I Made a Shark (his name's Nibbles)

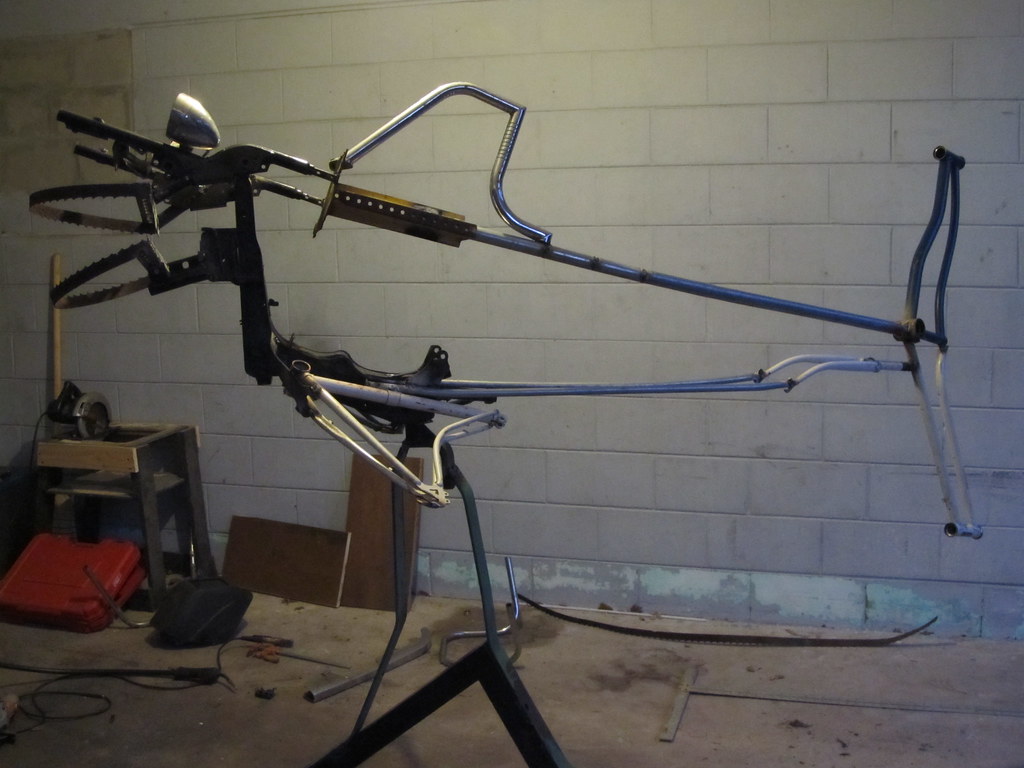
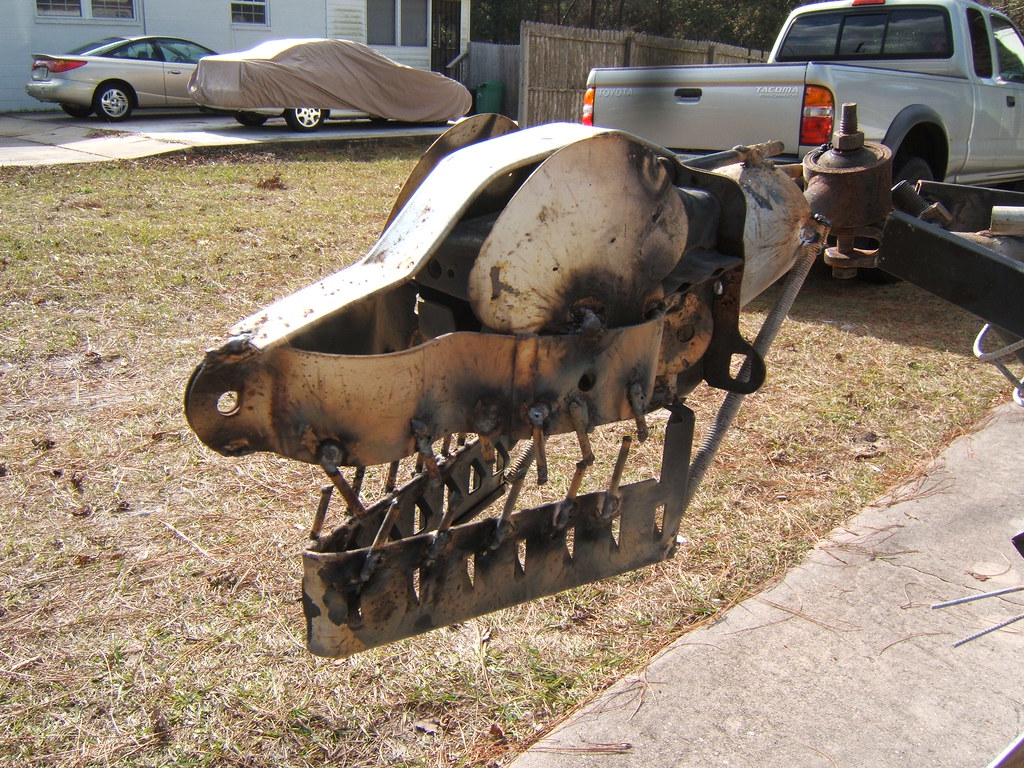
With the house being at a pretty stable place and having a space between the holidays and school/more house work starting back up I figured it'd be a good opportunity to make something new. I went and saw my friend Barbara after Christmas and among a bunch of other stuff she gave me there was a few chunks of a rusty old sawmill bandsaw blade which was screaming to be made into some teeth. We'd watched some of "Inside Nature's Giants" too, including an episode with a Great White, so when I grabbed a couple bits of blade that bowed into a D shape easily I knew a shark would be really nice to do with those blades.

I cleared out a spot in the carport to lay out some scraps and see what might fit where. A couple of old ladie's bike frames seemed to have a good shape for a tail, a leftover hunk of motorcycle highway bar would make a fine dorsal fin, a conduit spine, and a couple chunky bits of motorcycle and scooter frame would make a good base for the chest and head.

Cut, bend, bang, clamp, and weld and the basic structure came outpretty easily. Also after I cut the bike frames to make the tail I realized how nice and similar the leftover frame chunks were to the shape and size I needed for pectoral fins. I only managed to hit my foot with a hammer twice in shaping them the rest of the way to where I needed them too.

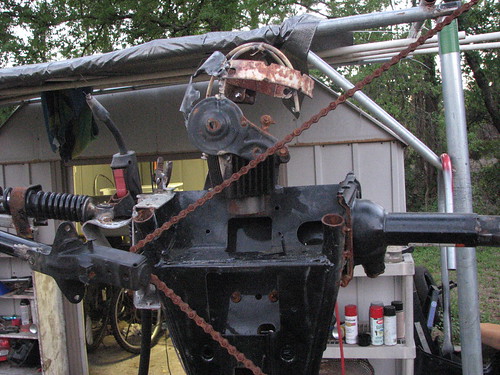
Before going much farther I wanted to get the whole thing up in the air at the level you'd be looking at it from so I didn't wind up attaching something in a way that'd look fine on the ground and awkward at eye-level, so I went about making a square peg fit in a round hole. The scooter frame chunk was in about the center of the body and had a nice reinforced chunk of tubing that used to support the handlebars and floorboard on a scooter in a previous life, and I figured it'd work well as a sturdy pivot in it's current life. I also found out that this hole was just about the same size as a small hitch receiver which I no longer had any use for since I traded my trusty CR-V for a Tacoma a while back. I've never seen a square peg go in a round hole so well.

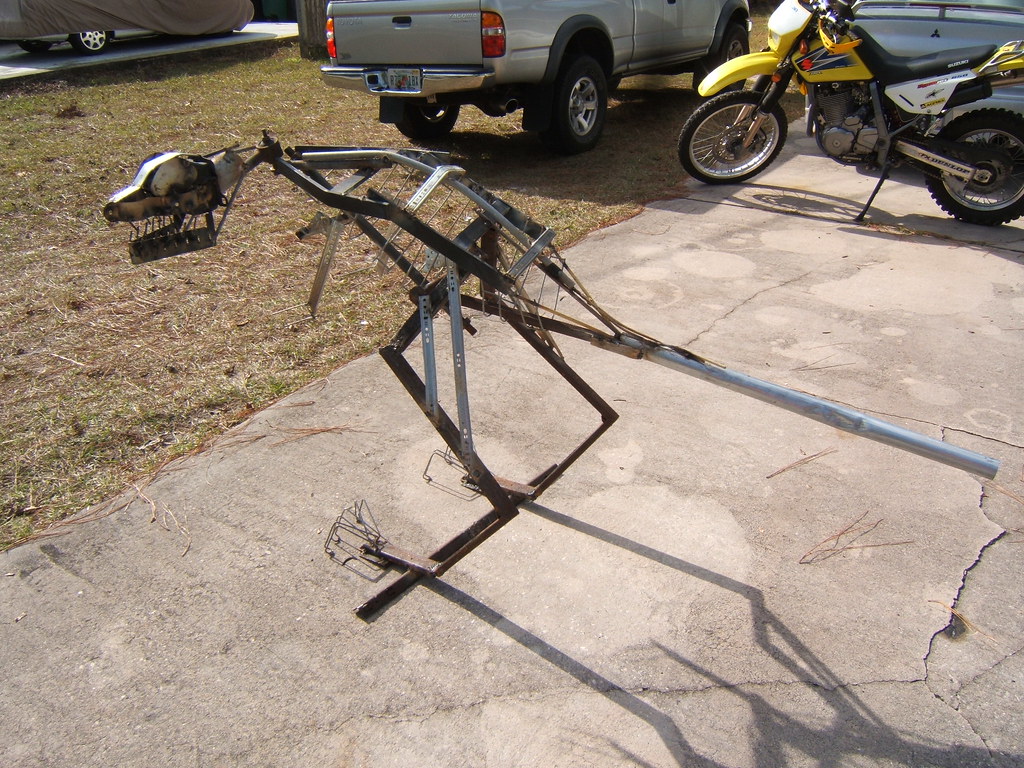
Now with the whole thing lifted in the air I put all the big fins in place and welded the top jaw up too. It was starting to look like a shark, but only from the side. Long-ways it only looked like a shark if you squinted and turned your head sideways, so I needed something to fatten up his cartilaginous bones. Rust-locked rims from a kid's bike looked just about right, but I didn't have enough to fill in everywhere I wanted to. I tried a local bike shop near my house to see if they had any similar wheels, but they only had aluminum ones. Then I tried the trusty rusty cycle shop near my dad's house since I needed to get a few things straight on my bike too and sure enough they had my bike right and a mess of small rims waiting for me before the evening was out.

The next morning dad brought over a bunch of lumber and plywood for the new roof, so I had to retreat to the back yard to work on the shark. The rims worked out great to fill in the body and give him some shape, but I was still worried about how I'd make the nose and head work out. My scrap pile is already on the skimpy side since the move, but it always seems to have something tasty and just right for what I need if I kick it just right. Turns out football helmet face guard + motorcycle chain guard = shark nose.

After that it was pretty close to done, so I added the last bit of highway bar as a back fin, another row of teeth, and a few other little bits to complete it. Since the archer looked so much better and felt so much more done once I wire-wheeled and clear coated him, I did the same for Nibbles. I made sure to go thick on the teeth, and that bandsaw blade feels nice and slick now. Can't wait to do some more stuff and see when I can go hopefully clog up the art walk again.
I've Been Making a House (with lots of help)


That's right folks, I'm not dead, but I haven't posted in a long while. The biggest reason for that aside from the holidays was that in October I moved into a house and started renovating it. I'll have to get some before and after photos up, but it started out looking like a pack of wild dogs lived here with holes in the wall, nasty smells and trash all over the place, and a patchwork of half-assed and jury-rigged repairs spanning back at least a decade.

Started out by gutting the place out: carpet, old heaters, nasty linoleum and congolium tile, trash, filthy counters and cabinets, etc... and about $200 worth of scrap metal behind the house which paid for a new front door since the old one had a hole rotted in the bottom almost big enough for a cat to get through. Then it was on to drywall, cleaning, and since my old house's lease was up: sleeping in the gutted shell of the new place. Waking up every morning with a nose full of drywall dust and no heat turns out to be a good motivator for getting to work.

My dad, me, roommate Justin, several of my friends, and some of my dad's friends and associates helped straighten out wiring, replaced every receptical and switch in the house, added a bigger circuit breaker panel, dropped the ceiling in the kitchen and hall to make room for central AC among other things, replaced ratty and chilly old windows (though there's still one left right now), and painted just about every surface in the house but the slab.

We also cut down and hauled out two big sycamore trees and a really big oak that had roots sticking several inches above most of the front yard, had ruined the driveway, and were threatening to do the same to the slab of the house though luckily it hadn't already. We also put up a privacy fence on the side of the house where the neighbors are a little too rowdy to want much to do with.

I also got two sets of 45 watt solar panel kits from Harbor Freight during the holiday sales and snagged a couple of nice big batteries from work as a storage bank, it's just sitting on the roof mounted to a pair of 2x4s. It's been working quite nicely and I've had my laptop and phone running on solar power ever since without running the batteries down even when it was cloudy several days.

And to top it all off the next and hopefully last big projects now that the house is starting to feel more like a home are to put a new roof on (and increase the pitch as well as change some other stuff about it), enclose the carport as a garage/workshop so I can finally stop working on things out in the weather and not have to worry about my tools walking off or getting wet, and turn the back porch into a master bath with attached laundry closet. Oh yeah, and we have to paint the outside once that's done. Still lots more to come, but holy hell it's come a long way already. Once I've got my workshop done up I should be able to more comfortably work on stuff, so stay tuned!

Monday, May 10, 2010

I Made Motorcycles

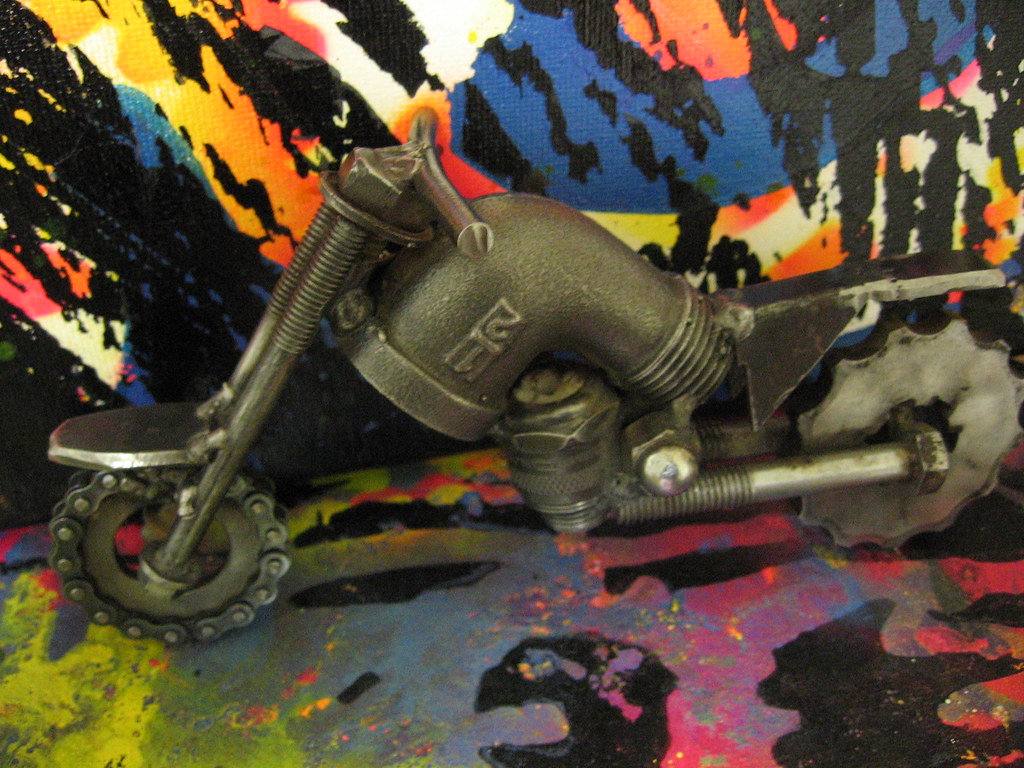
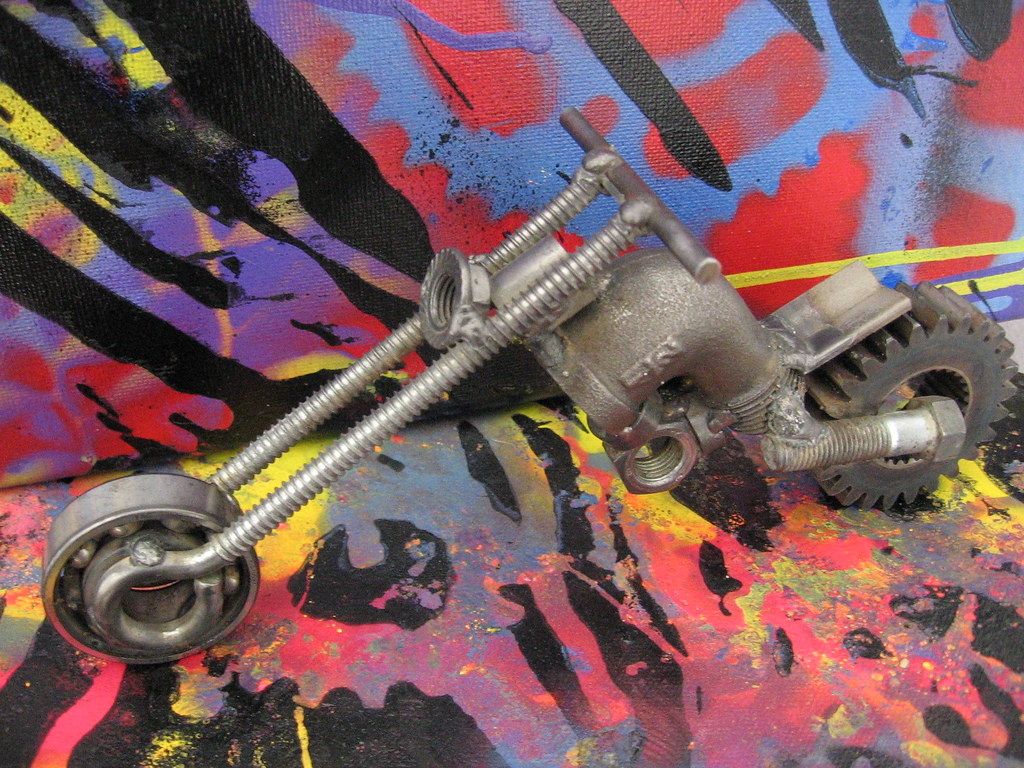
Well, a model of a motorcycle anyway. Gears, a ball bearing, and some various hardware bits combined to make this fine little bike. I forgot to add foot pegs and exhaust pipes, but I may go back and do that. To give credit where credit's due, I got the idea from these guys in Thailand. They're really talented. It's about 20cm (8") long.

Edit: Made this one too.

Thursday, April 8, 2010

I Made an Archer


It's been a long while since I got my welder and since then I've gotten a good deal better at using it and know what works well with. I've also gotten my scrap pile back up in size and there's been some nice goodies on it from sources as different as the woods behind my house and the local Harley Davidson dealership. Three of the best pieces to it were a pair of slightly scraped up exhaust pipes and a chunk of a motorcycle frame that reminded me of a slender torso.

I'd been thinking about getting a decent bow and arrow set to practice and get some stress off with, and with a pair of pipes that looked like a set of legs and a chunk of frame that looked rather like a fit chest, I decided that those and some motorcycle handlebars could be used to make a nice sculpture of an archer. I figured a human figure would be pretty cool to make and since I just so happen to be in such a shape myself I also had a decent pattern to go on too. As I was making it there were countless little moments I'd check the angles and shapes of things I'd done against how I'd do them myself. This photo of myself (taken by Bri Miller) was actually very useful in getting the positions of the arms right. I hadn't realized the drawing arm was basically turned upside down before seeing myself doing it.

As with the dinosaur, I started from the feet and worked my way up. The feet are made of hardware from a garage door with their angles and positioning modeled with my own as a rough reference. The left arm is a truck jack, and the right arm uses a small shock absorber to spring back and hold tension on the bicycle chain that is the bowstring.

The head was easily the most difficult part to make. I didn't have anything that already looked something like a head, so I had to find all sorts of little bits and burn my hands holding them in place while I tacked them together. having on welding gloves made it too awkward to not let some parts slip. I especially like the way the eyes came out. One is part of a bicycle's crank and the other is a ball joint from a car's steering rack.

The fingers were all made from motorcycle chain. #420 for fingers and #428 for the thumbs. The arrow head was the only part made from plain stock specifically to look like it does.
When it was all said and done, I moved the archer off of the temporary wooden base I made for him and welded up a steel base made of railroad tie plates my friend Barbra gave me and an old motorcycle highway bar with a nice twist in it. I also ran over the whole archer with a wire wheel to get the bulk of it's rust off and sprayed it all down with some gloss clear coat. He's looking pretty snazzy in the front yard now taking aim at passing cars, bikes, and one bright orange dinosaur.

Barbra also came by to see the archer and take some very nice photos of it just after the first sun-shower of the year. The first photo of this post is one of hers in face. They came out very nicely and you should definitely check out those any other stuff of hers here ,here ,and here. She also did a nice backdropped photo of my orange dinosaur here.

Saturday, February 28, 2009

I Made a High Security Bunny Pen


My previous rabbit pen was something of a flop. It was made of fencing that had rabbits on the name and in pictures on the package. In a week we lost one rabbit, had one jump out and get caught, and had the rabbits look awfully comfy with jumping "rabbit fence" height stuff. A nice big rabbit pen doesn't do much good when you can't leave the rabbits in it.

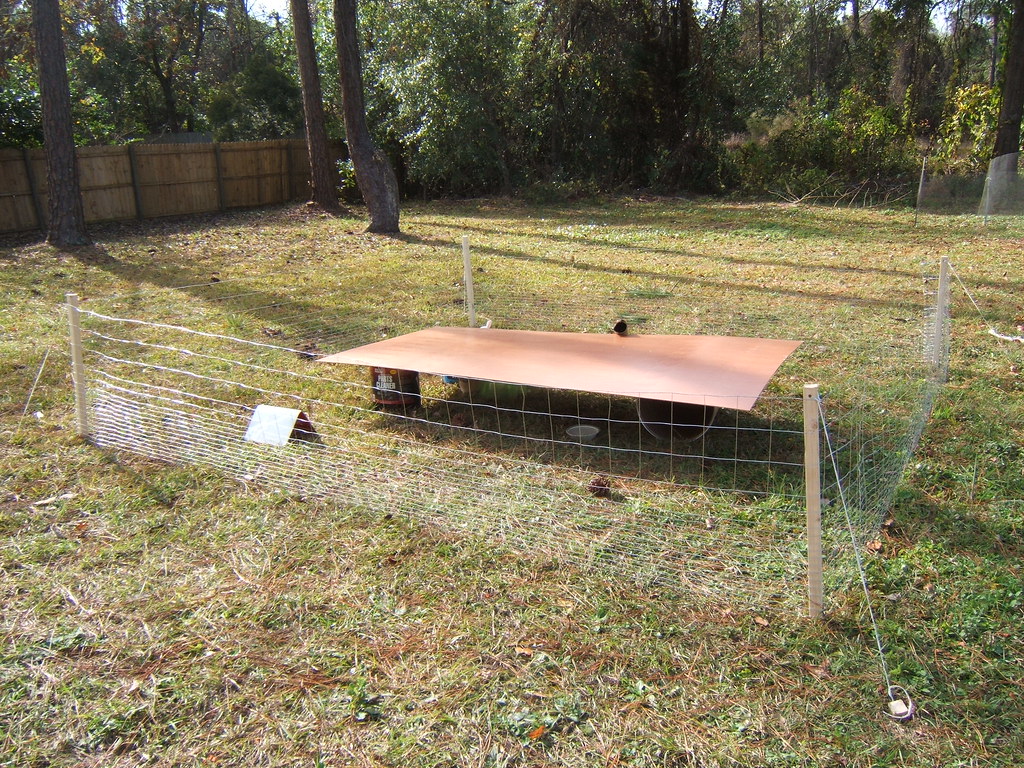
Anywhatzit, I took the pen down, cut the wide-spaced parts out, and made a smaller 6'x6' pen with an open side for the cage to sit beside and smaller spacing on the sides. I also put a top on it with paneling and some saplings so they can't get out.

Anyway, unless they start digging out they should be pretty well contained.

(UPDATE)
They tried to dig out. Their escape attempt seemed to be aimed more toward China than outside the pen. The cotton-tailed miners didn't seem fazed by my explaining that digging straight down would only lead to molten rock and eventually the southern part of the Indian Ocean, so I was forced to pull out a piece of chain link fence for a bottom to the pen. They can still sniff and eat the grass through it and can relax on hay I put in there as well. Waskawy wabbits.

Wednesday, January 7, 2009

I Made a Dinosaur


After getting pretty decent with a welder, and seeing my scrap pile behind the shed grow large enough to support making something interesting, I set about making something from the cornucopia of scrap steel I'd collected.

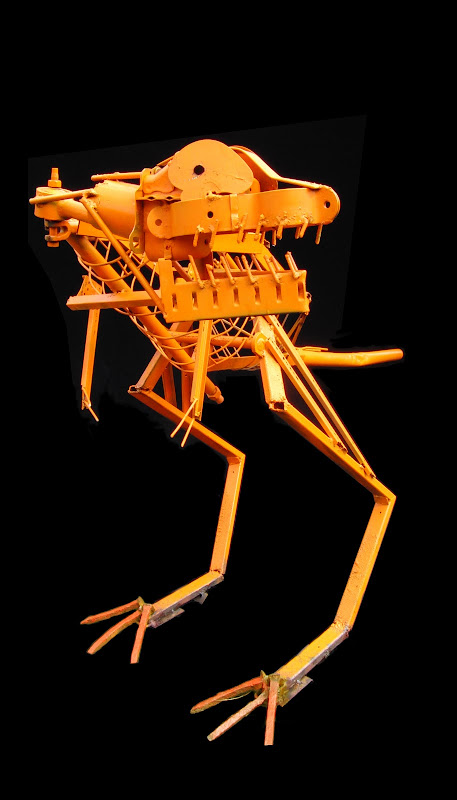
I had a rough idea of a bipedal dinosaur or dragon in mind, but no specific plan or places for pieces in mind (points for alliteration?). I began with the legs, using the welder to very inefficiently cut the metal that would become the legs, then welded the feet to the base, held the ankle/lower legs in place, and tacked them down. Then I did the same for the femurs. I added the back right over the legs, then worked on the basic back outline, adding reinforcements to the tack welds and making sure to keep the whole thing balanced.

Once I had the basic body shape done, I started adding more detail like the ribs, toe claws, and leg pieces. To shape the curve of the tail, spine, and other larger parts, I simply beat dents into strategic parts of the piece, then hit it on a tree to get the curve I needed, which wasn't a very forgiving process on the hands even in welding gloves. While doing all the welding and grinding on paint and rust I got plenty of odd and scared looks from the rabbits in their pen.

I then needed to decide how to make the head and whether to make a dragon's wings or a dinosaur's arms. Since my stockpile was getting somewhat puny I decided to go for the latter, using drawer rails with locking latches to give the arms some range of motion. Then I began working on the head.

The head consists of some steering linkage, a bumper mount from, a rack-mountable spacer for the lower jaw, pieces from a lawn-ornament of a happy little man that had wound up on my neighbor's trash, and some political sign supports for teeth along with other bits of scrap. The tilt of the piece the head bolts to makes it lean to the left, which looks good with the rest of the t-rex's posture. After riding around for a couple days with it strapped into the bed of my truck I'm not sure what to do with it, so it stands guard at the front door for now.

EDIT 4-17-10:
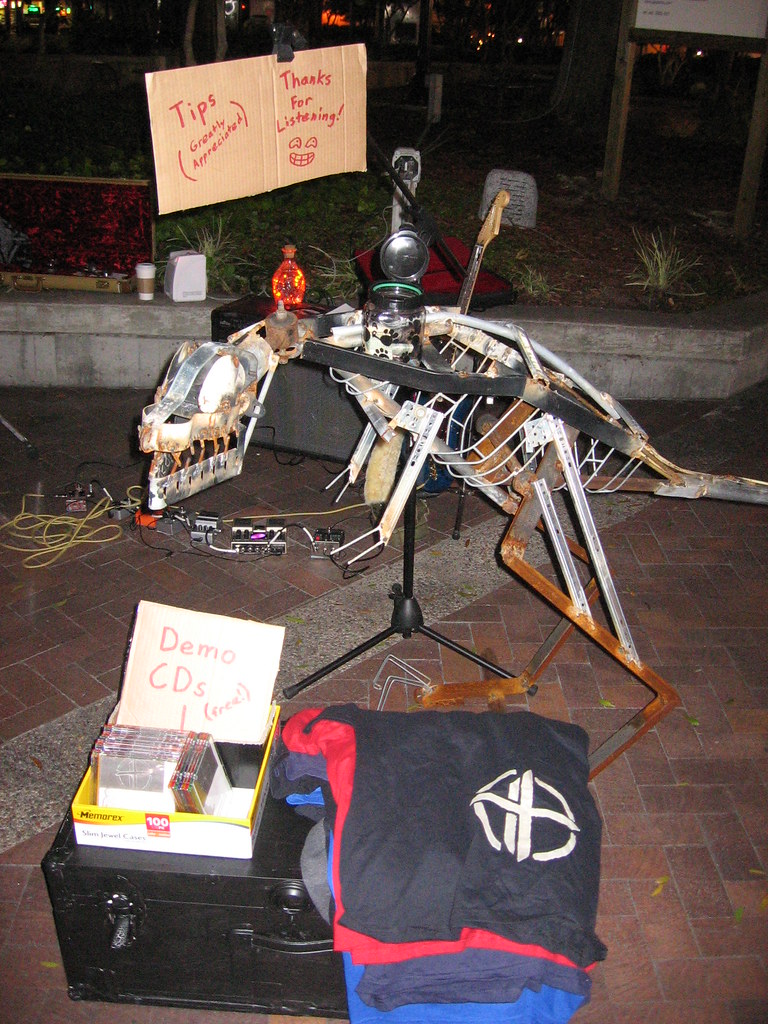
Since making him, the steel dinosaur has seen music and art, and has also had a few color changes. Daniel and the guys of the band Anderdown (of which I was part at the time) brought "ROFL-saurus" to a show at Jacksonville's downtown art walk when we played. ROFL-saurus may have gotten more compliments than the music.

Some time after that I painted him brown and black to keep him from rusting too badly, but when Halloween came along I decided it was time for a more seasonal color. BRIGHT ORANGE! He had a few problems with the toes being too thin and breaking off, so recently as I was working on the archer my friend Barbara brought me some railroad spikes and tie plates. The spikes worked out great for new super-sturdy toes and with a fresh lick of orange pain to match things up ROFL-saurus is gracing the front yard, being stalked by the ever-steady aim of the archer and getting funny looks from the neighbors. Barbara was even awesome enough to come take and put together some nicely backdropped photos photos of the archer and dinosaur.

Tuesday, December 16, 2008

I Made Stuff for Rabbits


The other day I got a bunny, so did my roommates. They needed a place to chillax and do whatever rabbits do like poop and run away from anything that moves or makes sound (supposedly they'll get more relaxed within the week), so I got some short pen fencing from [Giant hardware emporium] and some 2x2 poles and made a pen.

With a 50ft section of fence I decided to make each side 12' long, which leaves a little extra for future patches or mess-ups during making it. I cut the poles about 1 1/2' longer than the height of the fencing, then hammered them into the ground in a square shape. I used some baling wire to hold the first end to one of the poles and brought it around each corner, trying to make sure the fencing stayed as taut as possible and bringing the bends to a square corner at the corners. Next I hammered 1' stakes into the ground at an angle to the poles, drilled holes in the tops of the stakes and poles, then tied lines through each pole down to the stake as tightly as I could to prevent the poles from sagging inward. I also hammered the stakes down flush with the ground to tighten them up some more, and help mitigate the trip hazard.

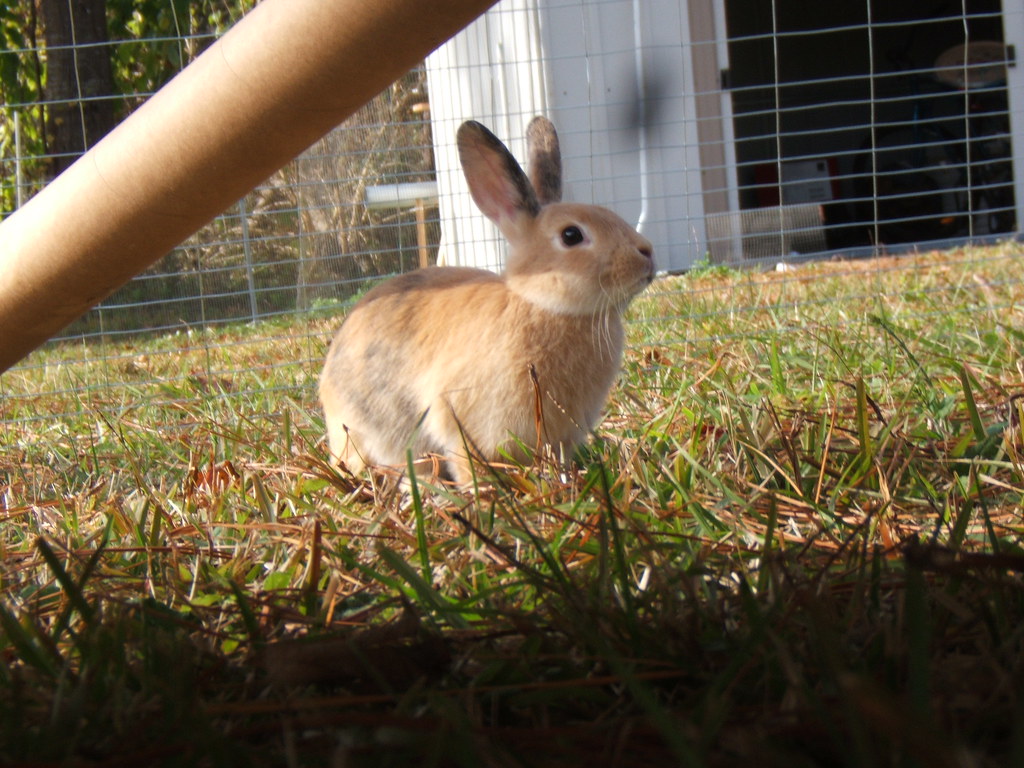
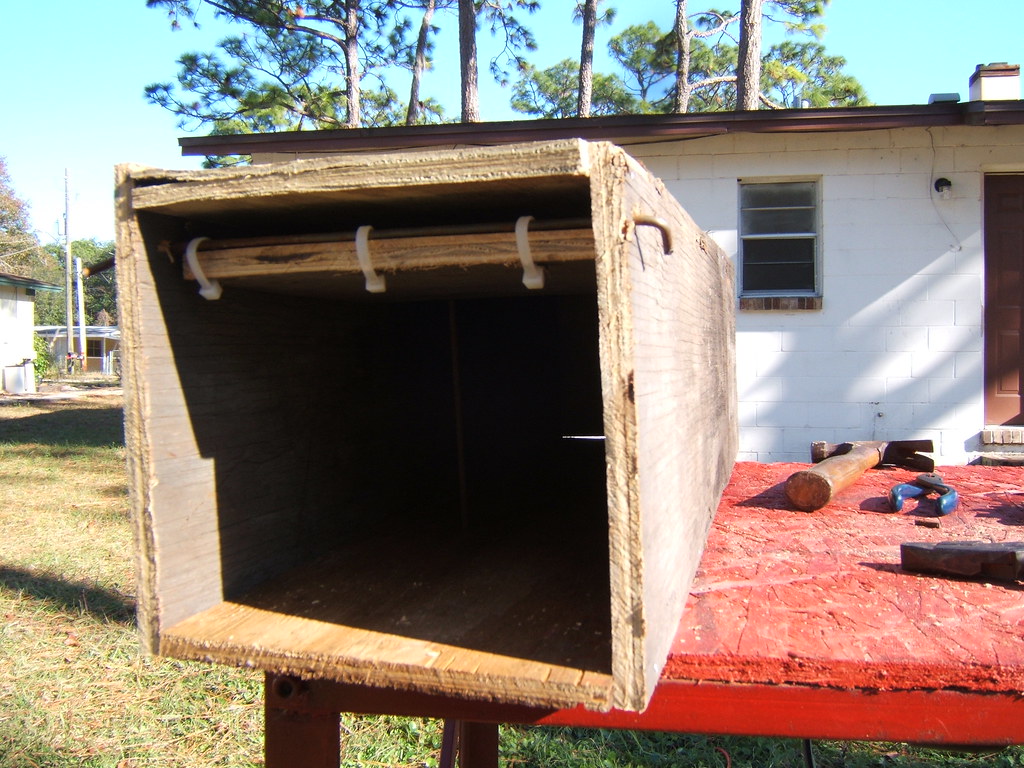
To give them some shade and cover I took a couple of metal cans and some paneling to make a lean-to for them. All seemed pretty well the first couple days and we got comfortable letting them hang out on their own for decent amounts of time, but the more skittish of the two (Bonnie) managed to push her way under the mesh and made a break for the woods when we tried to catch her. After an all-day hunt, some close calls, and a couple of days waiting for her to find her way into a trap it appears she's gone for good. The wooden box shown is my less-than-stellar trap. Maybe I didn't bait it properly. I didn't even catch a squirrel or raccoon.

I improved the pen with some metal hooks to keep the bottom tight to the ground, but the other rabbit (Dyna) also made an escape attempt; I assume by climbing over a corner. Between myself an my neighbor (thanks Mitch!) I got her back by tossing a blanket over her. My friends Mike and Sabrina got us a new rabbit I've dubbed Trillian and she and Dyna are currently making noise in the kitchen. They only get to go into the pen when there's someone around to make sure they don't cause trouble or make a break for it.

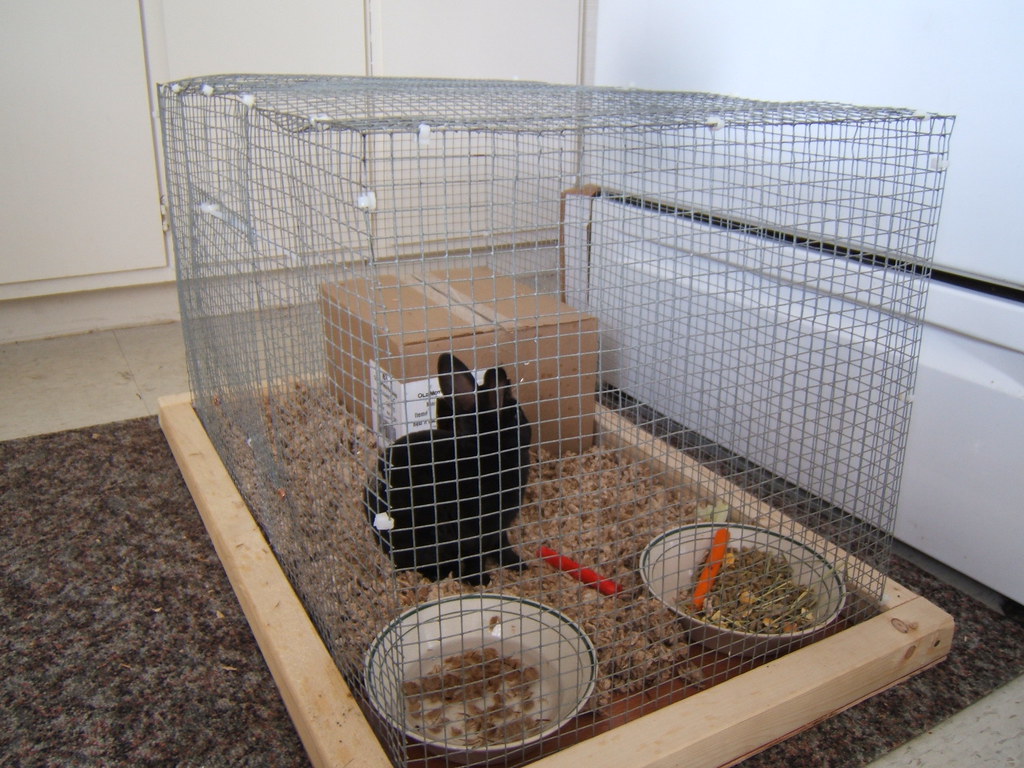
When we first got Trill she Dyna didn't take too kindly to her presence, so I had to make a separate cage for Trill. I cut some pieces of hardware cloth to about the same size as Dyna's cage, made a paneling and 2x2 base for it, and zip tied the whole thing together. It's not as good as a store-bought cage since she can toss bedding out pretty easy, but it's still nice and she won't need it forever since they'll eventually bond well enough to share a cage.

When they're in the house they need to stay in the kitchen so they can do as they like without the risk of pooping or chewing on things they shouldn't (or which our landlord wouldn't appreciate). To this end I made a couple of bunny gates for the two entryways to the kitchen. One is made from our good friends pre-finished hardwood flooring and 2x2s. That gate is just a couple 2x2s of the same height as the pen with planks of flooring nailed to it with gaps just smaller than the head of a small rabbit. The other is a baby gate Mitch was nice enough to pass my way with an added piece on either side to make it fit the wider of the two entries.

What I've learned is that rabbits need you to either spend lots of money on them to keep them happy and safe or they prompt lots of making things to do those things.

Sunday, November 30, 2008

I Made Metal Stick to Metal

I decided to give my new welder a go recently. It's a
small 110v flux-core wire welder and it's pretty handy for anything under 1/4". Anyway, after my dad giving me his old spare set of welding gloves and an old welding mask I struck some arcs and gave it a go.

A few years ago dad had me try welding on a small trailer that needed some work. The results were a "porcupine" of welding wire as he put it, so I figured I'd have to do better this time. After getting a feel for making a few beads on a piece of scrap and burning my name through a piece of thin sheet metal, I decided to try something more substantial. Taking a pile of steel scrap I had around, I fashioned it into an arm that moves at the elbow. While half-way through working on it my roommate ordered pizza and I had to go sign for the it. The delivery guy almost fell over when I walked up with the mask, welding jacket, and one glove still on.

I also made a small metal bracket from some political yard sign metal (the same as the fingers on the arm) for my room mate so his new air filter can bolt up properly and not wear holes int itself. it's pretty much just a rod with a loop on each end welded so a bold could go through.

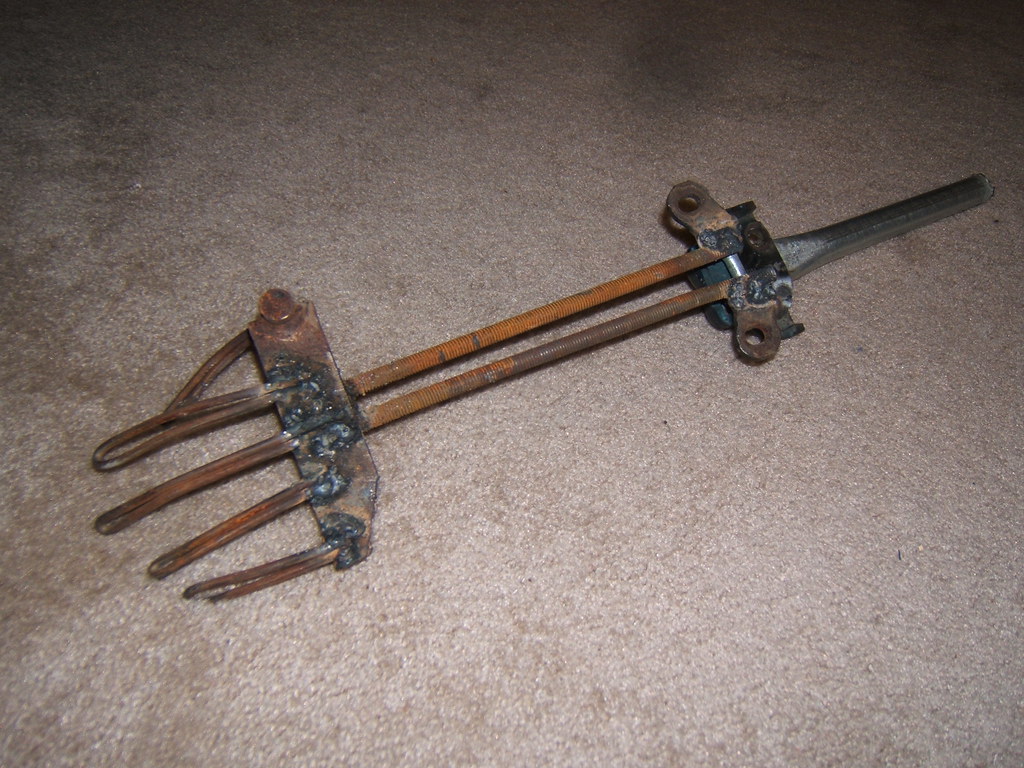
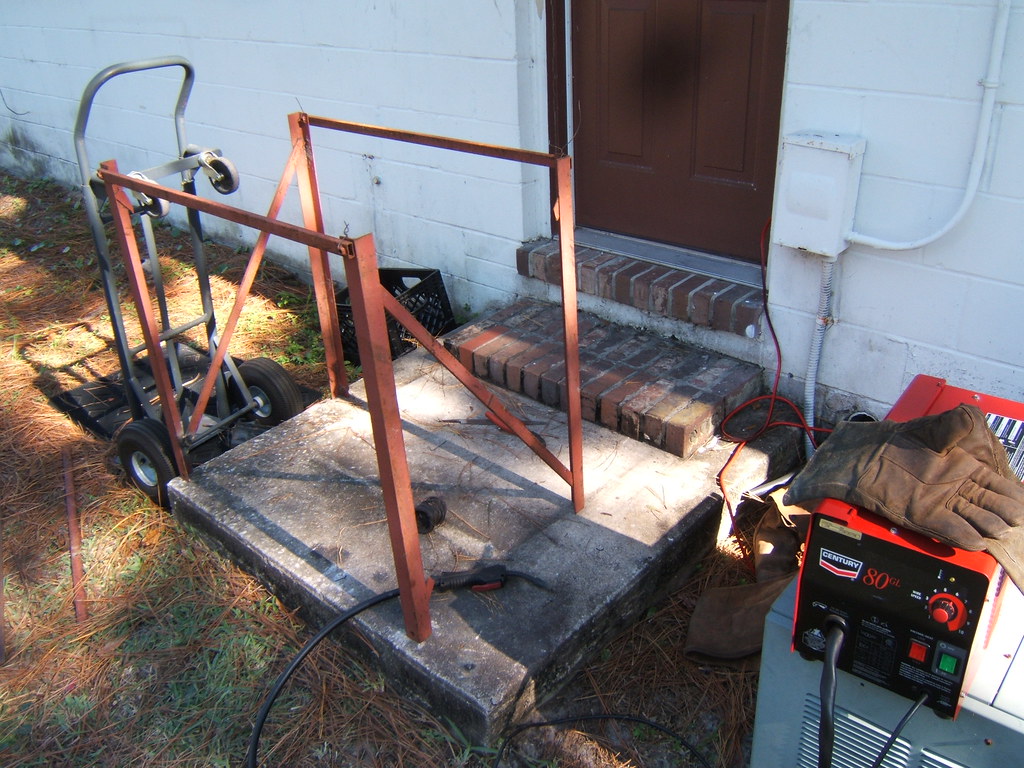
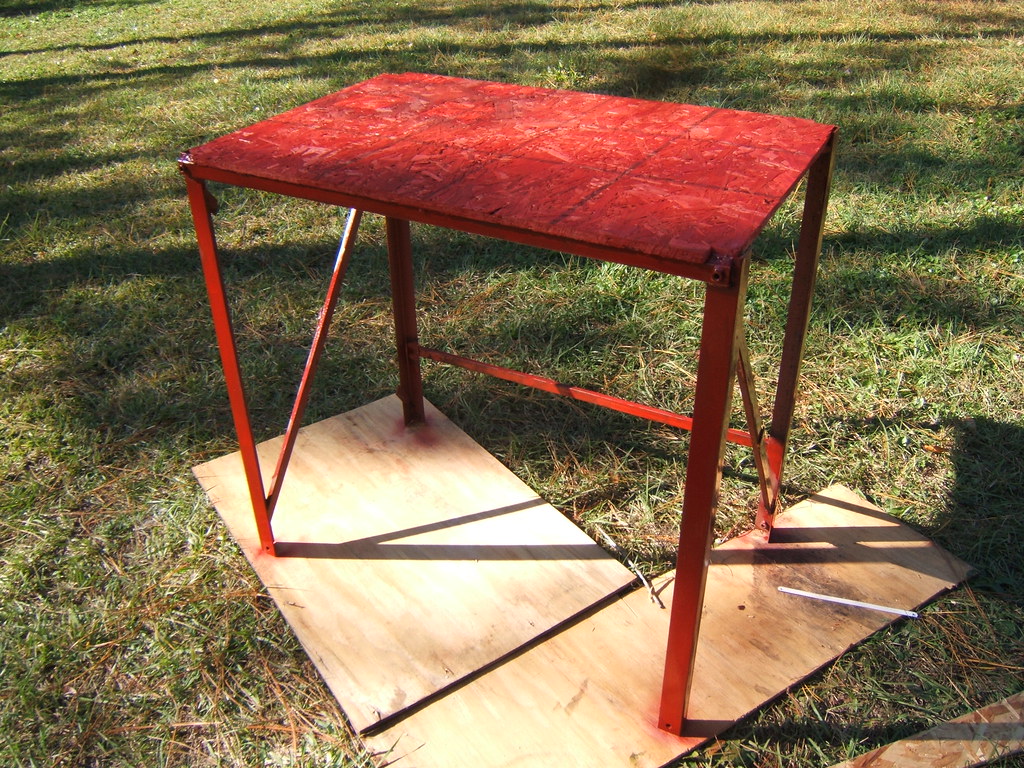
Once I'd finished the arm and bracket I felt more confident with my welds not falling apart, so I gave a shot at making a work bench. It's made of some metal shipping crate frame that I held together with baling wire while I tacked it together. It's pretty self explanatory to look at it, and sits pretty solidly, but I wish I'd had a magnetic square, as the corners are nowhere near square. Ohh well, it'll still work nicely. The table top is just chipboard and I painted the whole thing so it won't rust or peel too badly. I'm probably going to make it so I can bolt my Skil-Saw to it and use it as a table saw. I'd also like to get a vice mounted to it as well. At the moment the whole thing is just holding up my

Saturday, October 4, 2008

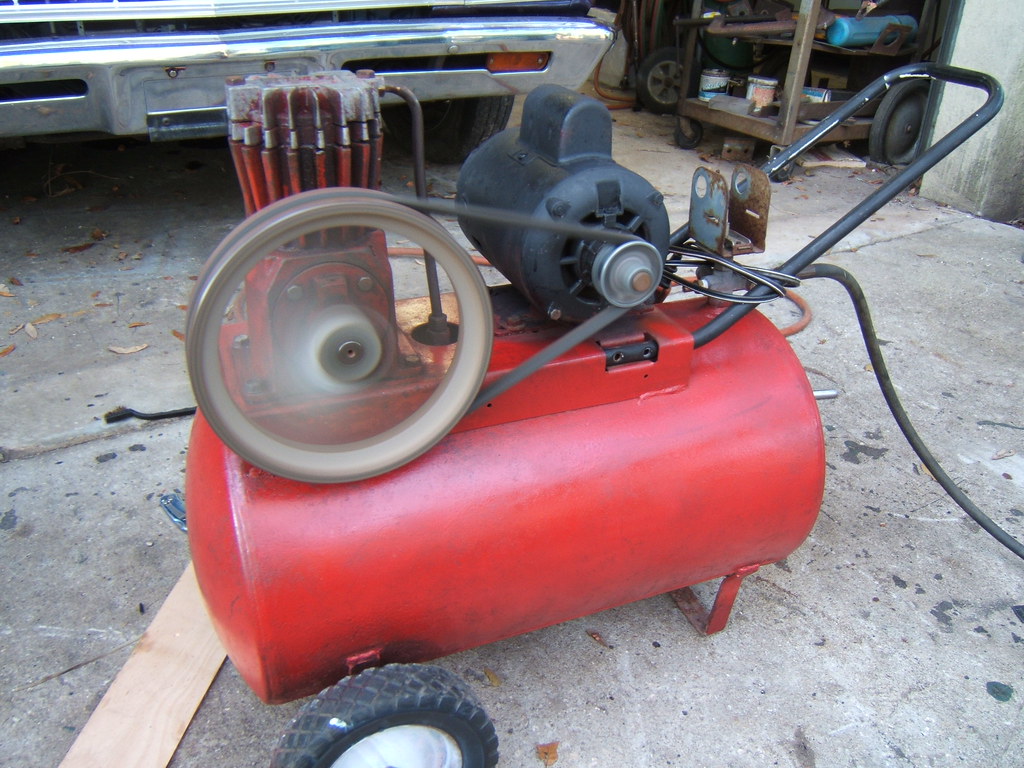
I Made an Air Compressor Work Nicely

I picked up an old air compressor that had seen better days from my brother a couple days ago. He'd gotten a larger permanent setup going and didn't need his old beat up compressor so I get the hand-me-down. Cool :)

When I asked what was wrong with it the list was along the lines of "something with the wires, it has a leak, and the gauge is broken." The pressure switch was also MIA, the belt has seen better days, and the whole thing looked rough as a pine cone. Time for a tear-down and cleaning.

I started by running it to figure out the problems since it did run if very poorly. The wiring was a lamp cord wrapped around the motor's terminals, the leak was from the compressor's leaf valve and from the copper feed to the tank, and the guage worked but was way off and sticks on 20PSI.

I took the head off the compressor, revealing a sludge in the piston chamber, as well as all over the two reed valves. Cleaned those up well with degreaser and a razor blade on the reeds, put it back together and it didn't leak there (and added about 10cc per cycle due pumped to not being full of sludge. I tried sealing the bad feed to the tank, but had to cut it shorter and put a new faring on the line, which solved that problem. I trimmed the frayed strands from the belt, oiled the motor, and attached the wires with proper connectors. With this done, I decided to check the crank case oil. This was a scary sight, as there was enough water in the oil to turn it a milky grey, and it was so old when I drained it most of it slowly plopped out for several minutes like grey snot. New oil in the case and it sounded happier while running. For now I'm testing pressure with a shrader valve and tire guage, unplugging the compressor around 100psi. After tightening the wobbly wheel up, I wire brushed the whole thing and painted it up. I also added a handle to make it easire to handle from my small blue pressure tank.

That "ka-pook-ka-pook-ka-pook-ka-pook" of an air compressor is a nice sound. Especially when it comes from something that was otherwise destined for the landfill. I know it might look a little rough now but by comparison to when I got it it looks great and runs fantastic. I expect this little thing will keep me in inflated tires and filled potato guns for as long as I like.

Tuesday, September 30, 2008

I made some LP baskets


Since the dairy industry did me the diservice of changing the shape of milk crates to not hold LP records properly before I was born, I've never been able to just pick up a crate to keep my records in. The cheapo bins from Wal-Mart are fimsy and I wanted something better but didn't feel like messing with replacing the flimsybin enough to make something.
Then yesterday my stepmom mentioned wanting a bike basket after seeing my bike rack. I made one out of the same blue news stand mesh, 12" by 9". When I brought it inside and set it down by my record collection though I realized it was the right size to hold records. I had to make more of these to keep my LPs in.

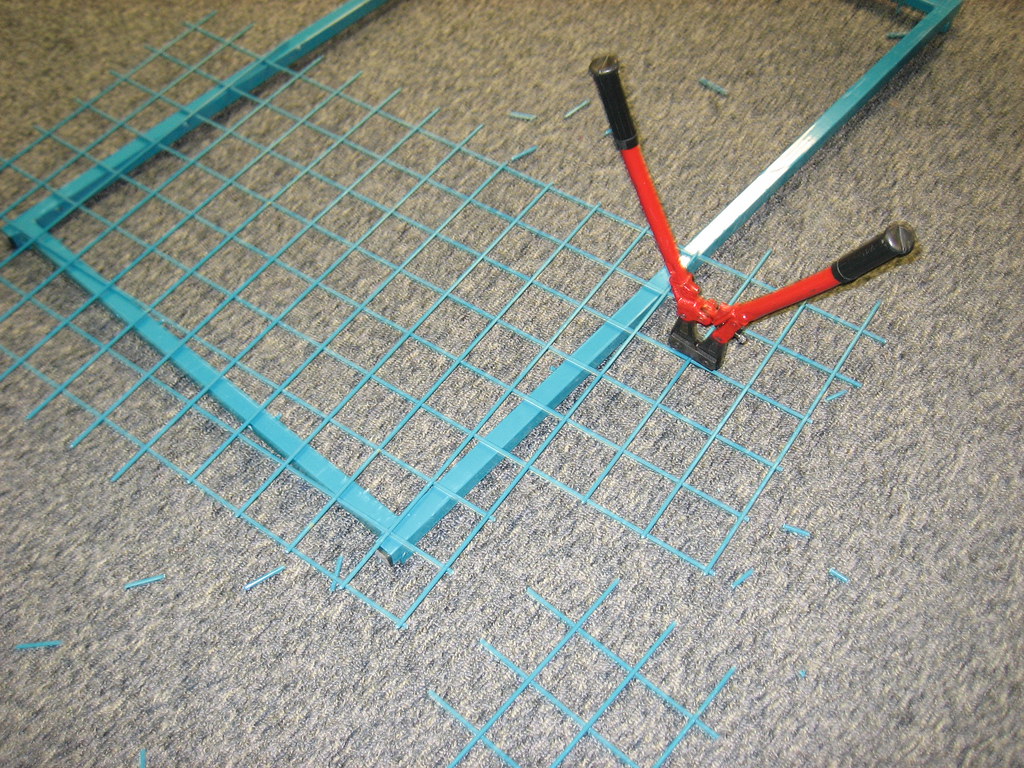
The construction is pretty easy. Cut out a lopsided or even sided T with at least one dimension of the middle being 12". then fold, beat, and bang the sides up and into place, holding them down with zip ties for a little extra support. They turn out nice and hold about 50 records each. I made a full out Instructable here. It got featured on the Instructables homepage, kinda neat to have happen.
Since I commandeered my stepmom's basket (the initial one) I made a couple more so she'll still have one.

Saturday, September 27, 2008

I Made a Nice Rack

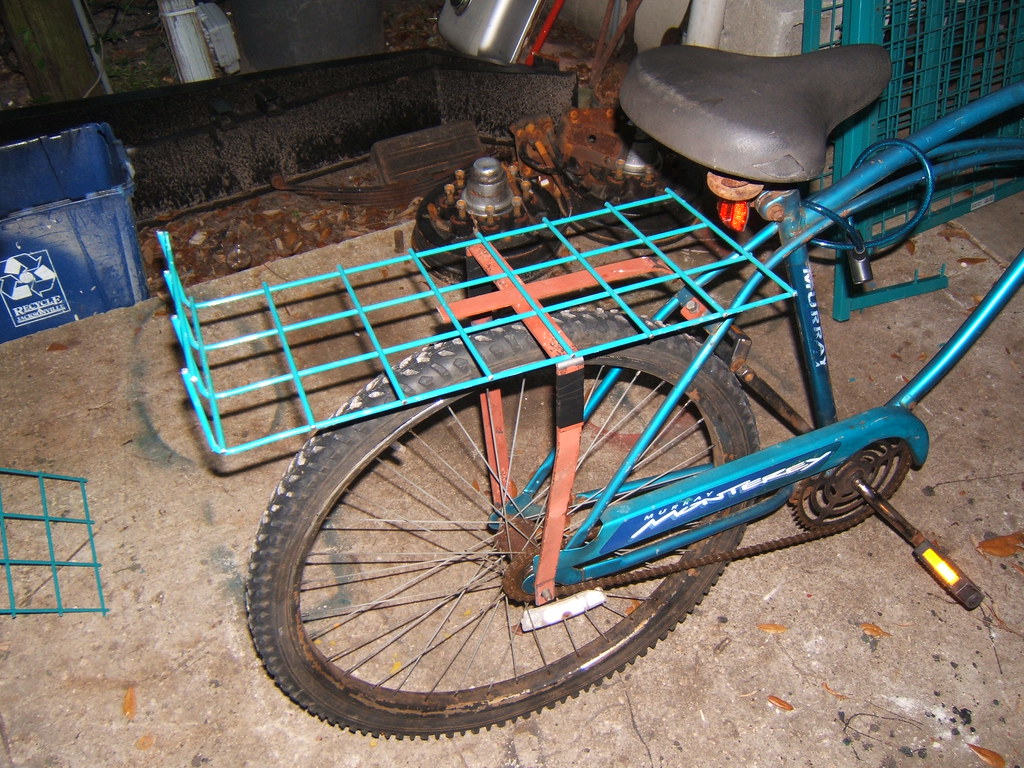
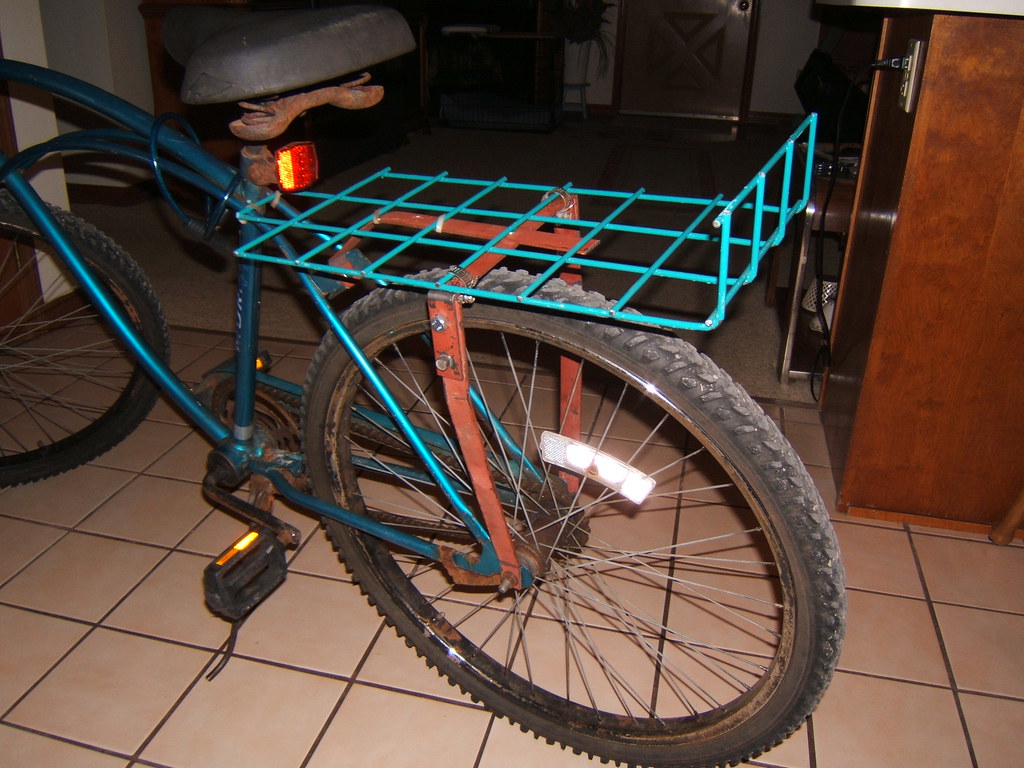
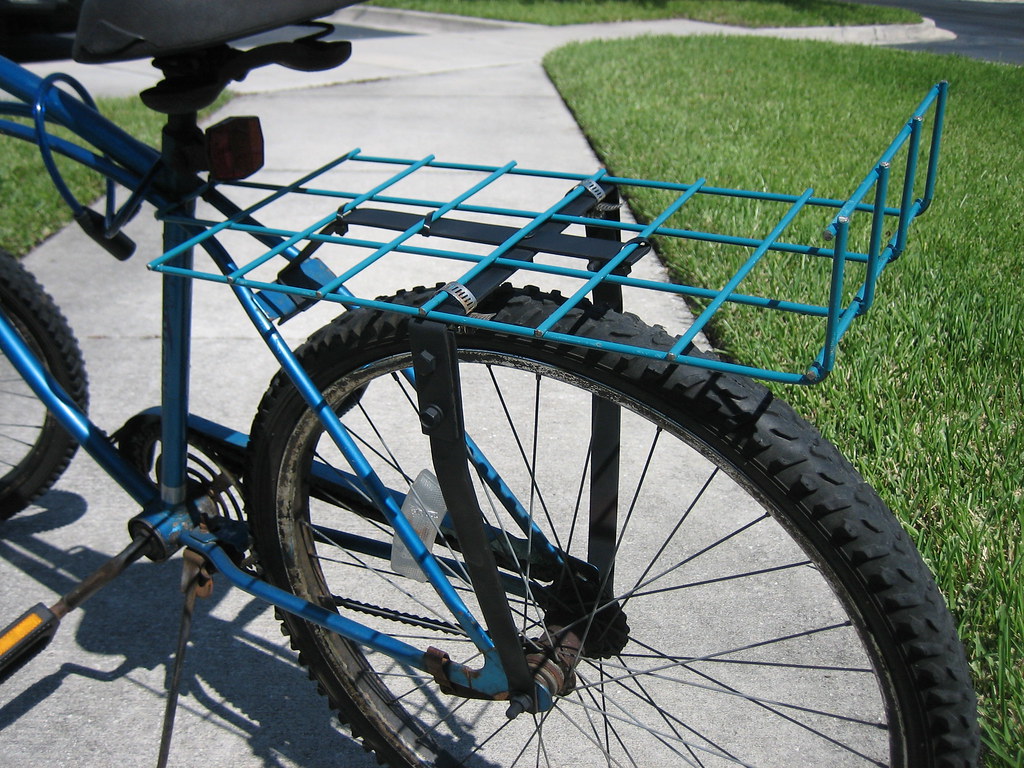
For about a month I've been riding my trusty, rusty, occasionally crusty bike around wherever I can. Gas is expensive and the exercise is good for my knee. Only problem is while on it I didn't have any way to carry things short of a backpack. While that works pretty well it does put extra load on me, which got me thinking about this nice rack a girl at FCCJ had. Not that kind of rack. Her bicycle had pannier cages. Moving on.

I went looking around and found the pannier style racks her bike had were too too big for what I usually need, and since I take great pride in the lacking looks, but smooth and easy ride of the bike, I decided to see what I could scrounge up. A little dumpster diving here, a little salvaging of some steel stock from my part of dad's materials junk pile and a handful of various mismatched nuts, hose clamps, and bolts from the garage and I had all I needed to make a bike rack.

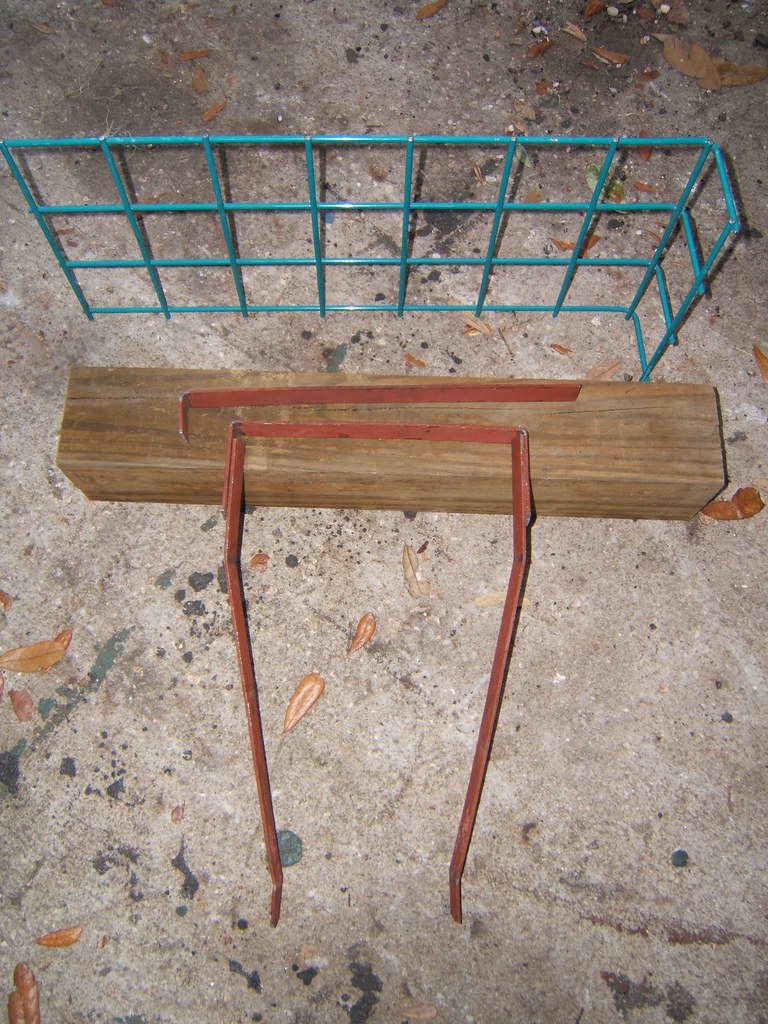
The construction is pretty simple once you free your materials form their donor sources. I used the vice to bang the upright arms, U base, rack deck, and frame support (my terms) into the shapes I needed, drilled holes in the proper places (all eye-ball, not a measured inch on the whole thing), then bolted and clamped it all together. I tell myself the totally mis-matched fasteners are there as a means of keeping it from being stolen since you'd need the better part of a tool set to get the whole thing off of there. I had to cut a small chunk out of the front left and right since standing upright could let you bump into those parts, but this didn't impact carry capacity.

I'm very pleased with it and I'll probably give it a decent wire-brushing and a lick of paint when I get a chance. That or I might just leave it as-is for now.

Update 1:
I've gone ahead and painted the rack, it looks much nicer now and I've also made a pretty detailed set of instructions for it over at Instructables.com

Tuesday, September 16, 2008

I made something to clean rust

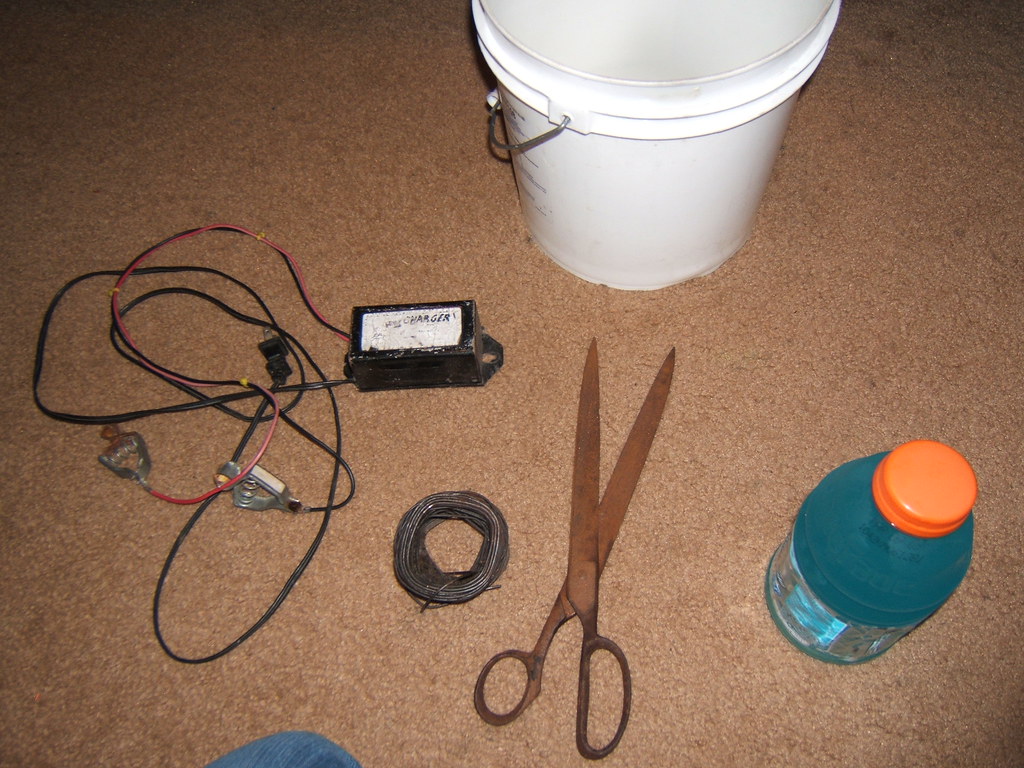
I was reading a post on makezine.com about electrolytic rust removal. The setup described called for rebar, washing soda, a battery charger, a bucket, wire nuts, wire, and several other parts. Looking over the whole thing though it seemed like the whole setup just needed the charger (or any low voltage, decent amperage power source), an electrolytic solution, the metal to be cleaned, and an anode which could be any conductive metal. I wanted to test it out as cheaply as possible to see how effective it could be without making a big to-do about setting it up.

My materials were as follows:
Salt (1/4 cup or I just poured til I felt jazzy)
Water (the wet kind, not the solid kind)
Baling wire (cheap, metal, and flexible)
6-12v charger (anything more than 10 amps is serious overkill and won't work any better)
Bucket (which you should always has)


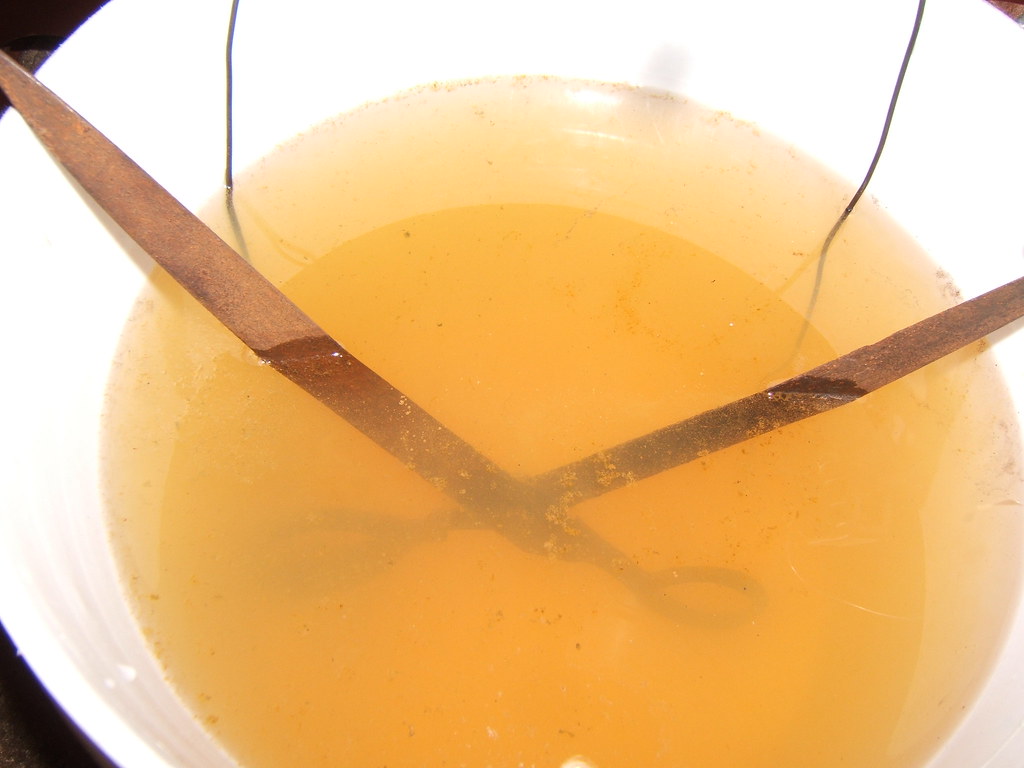
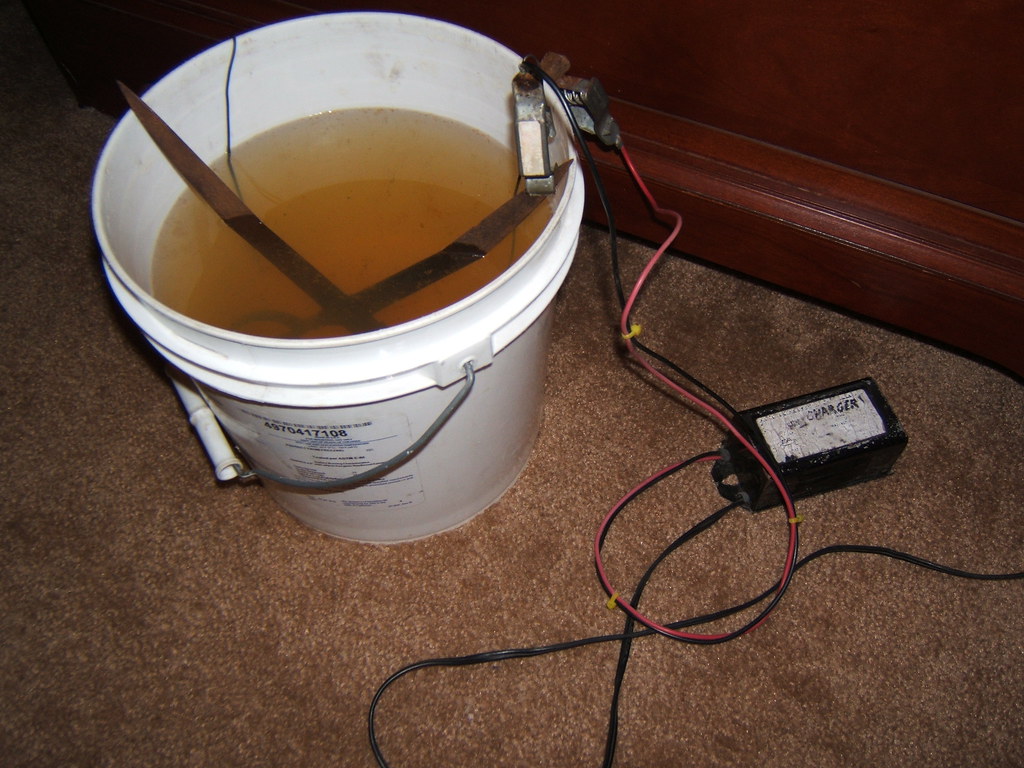
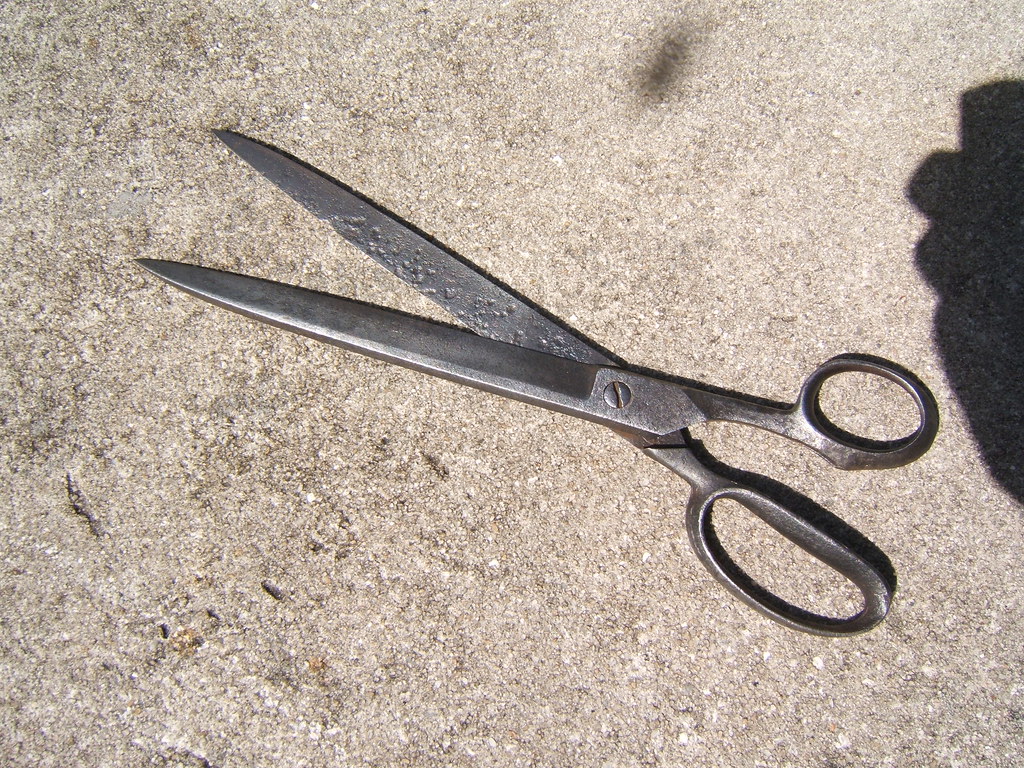
Setup is pretty simple. Fill the bucket with water, mix the salt in well, bend a piece of baling wire so it sits in the water down to the bottom of the bucket in a couple places. Next attach the + (red) charger cable to the baling wire and the -(Black) cable to the piece you want cleaned. Set the peice in the water (fully submerged is preferable) and plug in/turn on your charger. You should start seeing bubbles within 30 seconds on both the submerged wire and piece. My scissors bubbled more on the side with clamp because the joint in the middle doesn't connect them terribly well I guess.


After leaving the whole setup in a well ventilated place for about an hour for smaller things, more for larger, you should be able to take a wire brush to clean off any remaining rust, then redipping any parts that weren't under the water before. You can leave it in longer, but I was happy with the results I got with about 1:30. Taking a wire wheel, wire brush, or steel wool to clean the whole thing and then keeping it either clearcoated or covered in light oil will prevent further corrosion. Shabam!, from rusted solid to ready for re-sharpening in an hour and a half. I need to hit up a flea market and get some rusty but awesome old tools to do next.

Sunday, June 29, 2008

I made a strange looking guitar

This is a project I've been messing with on and off for a long time now. Since I've known my friend Daniel I've been learning about guitars, the forms they've taken, and musical things in general. One thing I've often tried to do is imagine strange configurations or ways of modifying guitars to make them elicit a previously unknown sound, this proves to be very difficult since there have been close to 80 years of people doing strange things to guitars to amplify them. It seemed like every time I would think up or imagine some combination of parts to make a guitar do something none had before Daniel knew of some obscure instrument that does just such a thing or my idea had been tried and wasn't of any real use.

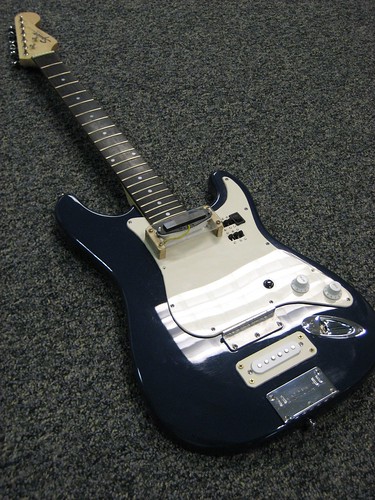
During one of my idea-making moments though, playing with one of his guitars while it was partially disassembled, I came up with an idea he hadn't heard of before. The idea was to take a Stratocaster-style guitar, and move the middle pickup to the outside of the guitar, sitting over top the neck pickup. I figured it might make for a clean sound like a single-coil pickup, but also be useful in clearing up the "hum" that humbuckers "buck", or cancel out.

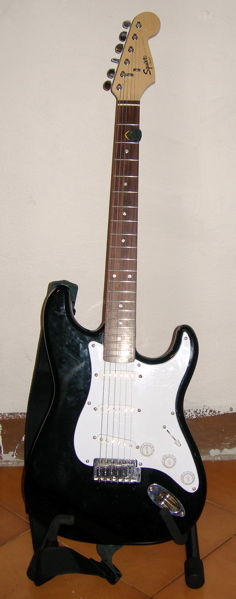
Between the two of us, we got a Squire Bullet from a pawn shop, a simple, no frills strat and set about figuring out how to turn it into something neither of us had ever heard of. We eventually came up with the idea that as long as we're modifying the guitar and since we'd have to route room in the body for switches to set phasing, turn on/off pickups, and run pickups in series or parellel we might as well make a spot to move the bridge pickup and modify the bridge to have an extra run of strings below the bridge with a pickup under it. This would allow for the guitar to directly pick up playing on this short and high pitched length of strings. To the left is what a similar Bullet looks like, and what the Hoverbucker started out like.

I quickly dumpster dived some white sheet plastic (shower wall panel) and made blank copies of the Bullet's original pick guard. A month or two later I cut and shaped an old aluminum "out of order" sign into a replacement bridge and made a mount for the exposed pickup from some scrap plexi-glass and wood left over from making the lightbox. There won't be much of an ability to intonate the bridge without filing it down, but we'll cross that bridge when it comes (holy-crap-pun-lol). Since I'm not familiar with the specifics of setting intonation (I can scarcely tune a guitar) I'll leave that to Daniel to advise on. I also removed the bridge saddles from the stock tail piece so it can be used for a tail piece at the bottom of the guitar.

After that, I posted pictures and the idea on the Harmony Central Forums, asking anyone there for their input and ideas, as well as finding a wiring diagram for a similar setup that allowed for a lot of choice with regard to the switching setup. From here the project sat untouched for several more months while other things in life needed more attention such as school and my nephew's guitar. It went in a bag next to my hand made longbow that needs to be tuned and set. Now that I've had some time to work on it some more and I already had need of a router thanks to the cigar box guitars I've worked on over the last week I figured it would be a good time to make the body modifications that the hoverbucker guitar needed. I got to try my hand for the first time with both a table and hand-held router and they both were nice to use thanks to Mr. John's assistance explaining their proper use.

As a side note, this blog is serving as a good motivator for me to finish projects that have otherwise sat half-done for a while. It's nice having somewhere to show off the stuff I do with the added bonus that someone might actually care enough to read about it. What ever will I do for updates once I run out of half-finished projects to finish for a quick post's worth of material? I might have to go back to building things from start to finish. :O

Anyway, I then went about cutting up another of the pick guard blanks into a cover for the bridge pickup, I just cut it into a rectangle, rounded the corners, and smoothed it with a file. I then drilled some holes for the switches to mount into, widened the hole for the kill switch from the original volume knob hole, and for the screws in the bridge cover. I put it all together and dummied up everything in place. I have to wait until tommorow to get a DPDT switch to replace the SPDT switch I have in place for the phase switch right now, but you can get an idea of how it will all look now. I'm still not sure how it will work or if it will unlock some strange, never before heard sounds, but it certainly looks interesting so far and even if it's just a strat with an extra weird pickup it'll certainly be a unique instrument.

(Update 1)
I finished the guitar, and it does some interesting things. After showing it off on this Harmony Central thread it seems to be getting a good recepion. Here's a couple videos of Daniel playing it. He seems pretty stoked about it too.


As usual, there are more photos on my Flickr page.

Tuesday, May 13, 2008

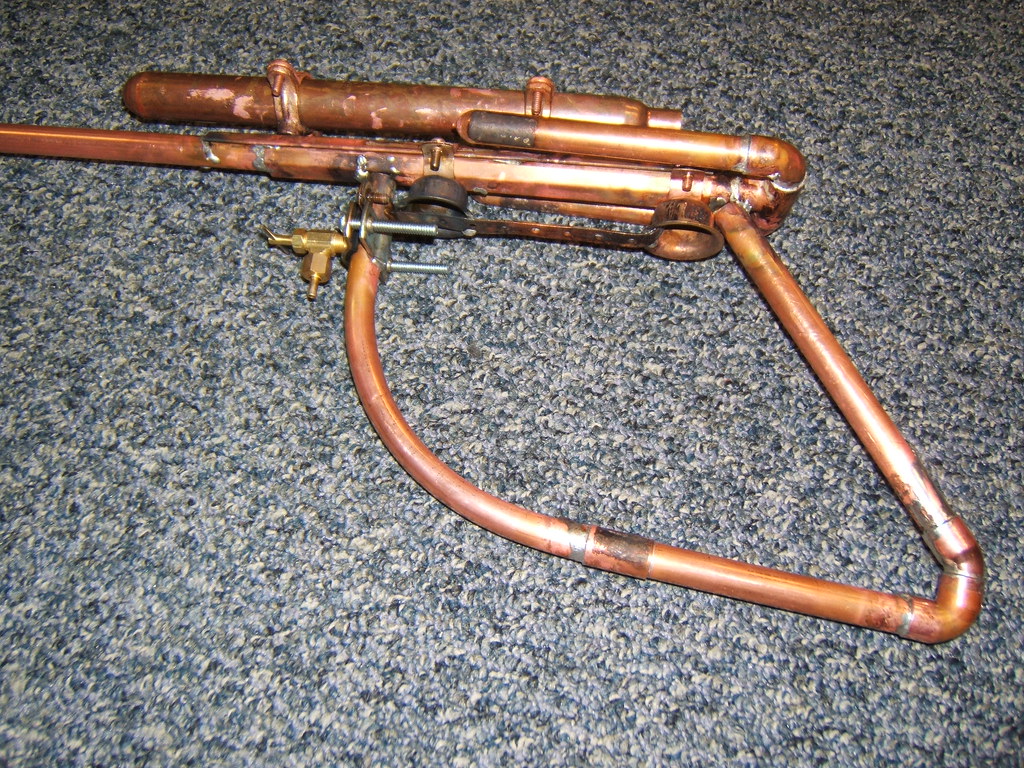
I made a steampunk ray gun

I've been looking from the edges at steampunk subculture for some time now. For the uninitiated, steampunk is the the idea of trying to imagine what the things we have today or may have in the future might look and be like if they were made with the style and technology available during the Victorian era. If you've seen the movie Wild Wild West or watched the Firefly TV series, these could be concidered steampunk in some ways. I highly recommend watching Firefly by the way.

I love this a la carte re-imagining of the past/future, and decided to make something from this world which never was. I decided that a "Pulse Amplification by Stimulated Emission of Collected Aether" (PASECA) device (A ray gun) would be just the ticket.

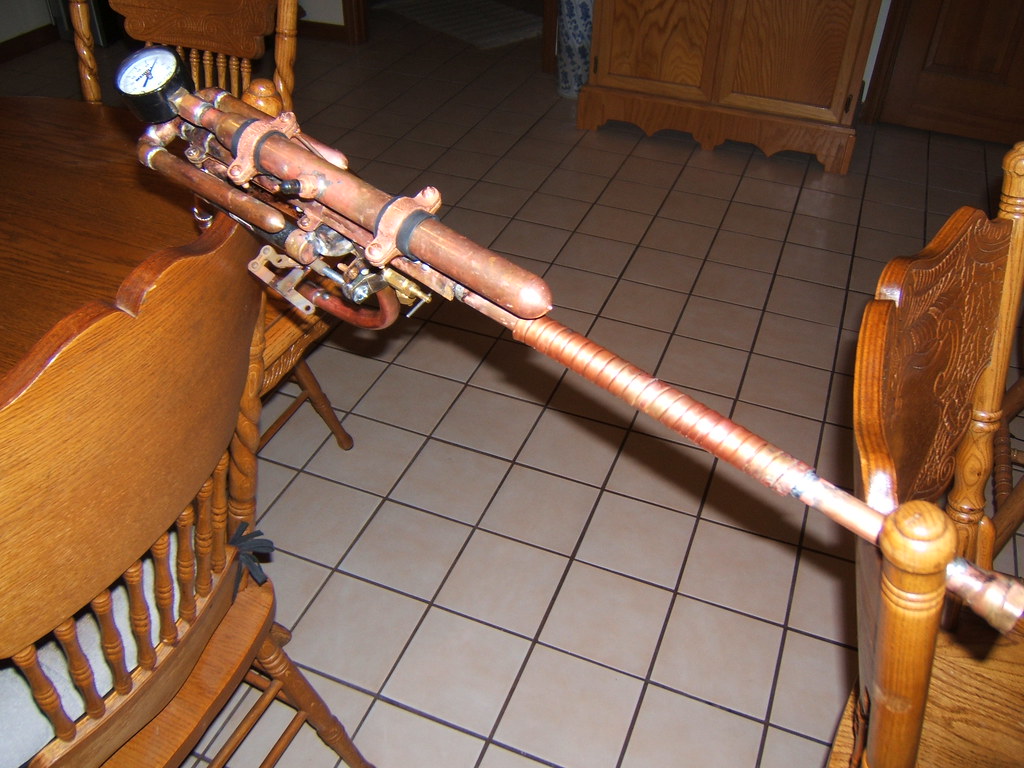
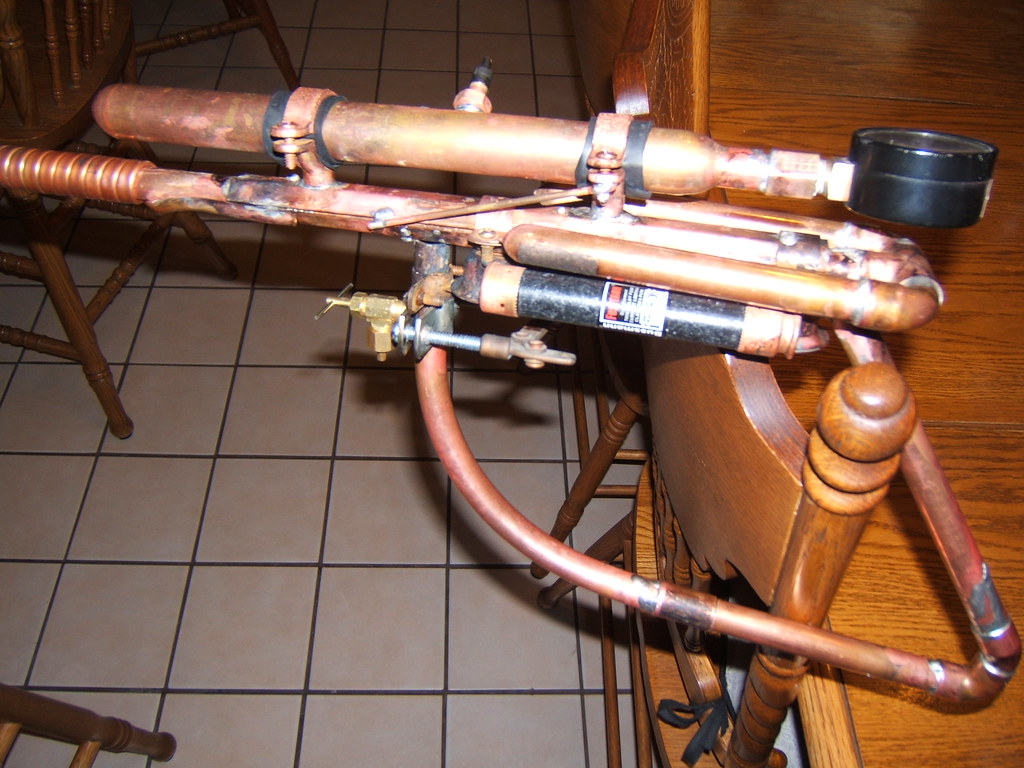
Since I don't have many gears (a common theme in steampunk design) laying around, I decided to go more for the look of coils and linkages in my design. I use the term design loosely though since there wasn't any real design. I started by going to Lowes, grabbing an armful of copper and brass odds and ends, going back for a shopping cart, then setting peices around one another until I saw something I liked. I think it turned out quite nicely since I've had no real experience working with copper/brass soldering. I'll have to write up a nice product/spec sheet on some tea-aged paper with a nice pen to go with it. This is what the PASECA device looked like part-way through construction. The hissing sound of quenching hot metal is very satisfying.


Since I wanted the guage on the back to be at some value, I made the tank it's attached to air tight and added a tire valve to it so I can have it really hold pressure. I've also added some leather to the front of the handle as a better grip. Without further Adieu, here it is:


Next time I make something steampunk-like I'd like to make it with more brass, which is a much easier metal to solder to than copper, but they're both expensive as heck right now so I'll also be putting off the next project until I get enough scrapped dodads together for at least most of it.

And Here's a photo of myself with the ray gun in somewhat Victorian garb. I need to finish my goggles....

How to solder a rotary switch beautifully

 Lately I've been soldering quite a lot. hundreds of wires for a small batch of test boxes for work. Nothing conceptually crazy, just a ...