Friday, November 6, 2009

I Made Up My Own Alphabet

I was looking at the pattern of some leaves painted on the back of someone's shirt in a class the other day and decided to mimic the strokes the leaves needed to be drawn with. The resulting stuff looked like it might fit in with various Asian calligraphy systems. It got me thinking on written language some. I figured it would be neat to come up with my own writing system, but knowing only english and the Latin alphabet fluently enough to try my hand making something new, I decided that rather than make an entirely new character, grammar, and word system (Ala-Esperanto) I'd just figure out a better way to do English writing.

What could possibly make English an even better language to write in than it already is I hear everyone say (aside from poorly sticking to rules, exceptions to pronunciation and conjugation that drive that make a phone book on their own, etc....), well obviously the Latin alphabet! There are many letters that can be too easily confused and with good punctuation you have little need for capital and lower-case letters rather than simply a letter. I decided there were some things that could be done to improve things:

* Cut down or eleminate letters and numbers that are indistinguishable when written with less than stellar or quick penmanship (no more 1,I, and l or U and V looking too similar when you're quickly jotting things down).
* Keep the per-character stroke count down. No need for a 20-stroke chinese character when a couple simple slashes will do.
* Avoid conflicting with english and numerical punctuation and notation (the + sign is easy to do, but will conflict with universal math language
* Avoid wasting simple to write characters on infrequently used letters (X is easy, but how often do you use it?)
* Try to keep parity with the Latin alphabet whenever possible (not a huge deal, but why reassign L to another letter without a good reason?)

Anywho, I messed around with making characters that applied to these rules and then assigned them places in either the 0-9 number set or the A-Z letter set, and this is what I came up with. The numbers make it easy to at a glance figure out where you are from 1-9 and the letters could be scrawled as poorly as possible and you'd still be able to tell what was meant. Anyway, it looks pretty geometric and neat so I may or may not try to memorize how to read and write in it. Maybe just a nice font for writing in it would be in order?

Monday, October 5, 2009

I've been making things

It's been a little while since I posted last. That's been somewhat to do with changing jobs a couple times, working between 40 and 75 hours a week, and now going to school while dealing with other stuff that life's been tossing at me like barrels down an 8-bit ramp. Fortunately for my questionably existent viewers here, I've been making things other than ends meeting as of late as well. Here's they am.

Sock Monkey:
There were far too many socks that were worn to paper thin or full of holes and they were piling up, so I decided to make a sock monkey from them. A proper and classic sock monkey calls for some basic sewing and cloth working skills and either a lot of free time or a sewing machine. Being as I don't have a sewing machine, but I do have a hot glue gun I made use of the latter to fashion and attach his various body parts. He's stuffed with socks. Daniel's more or less claimed him now so I guess sock monkey's a success!

Pit Bike Bodgery and Robbery:
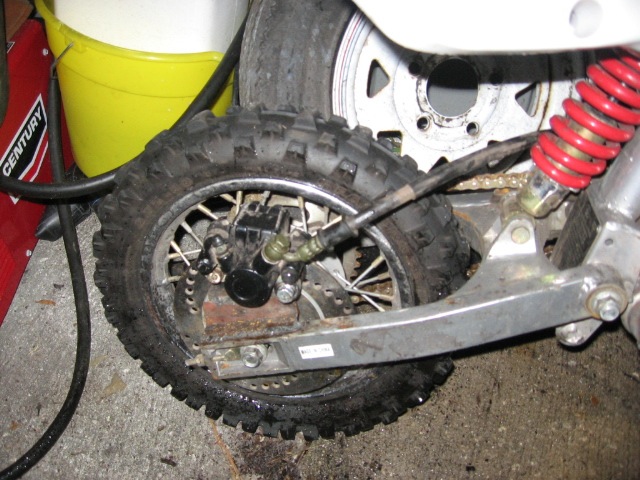
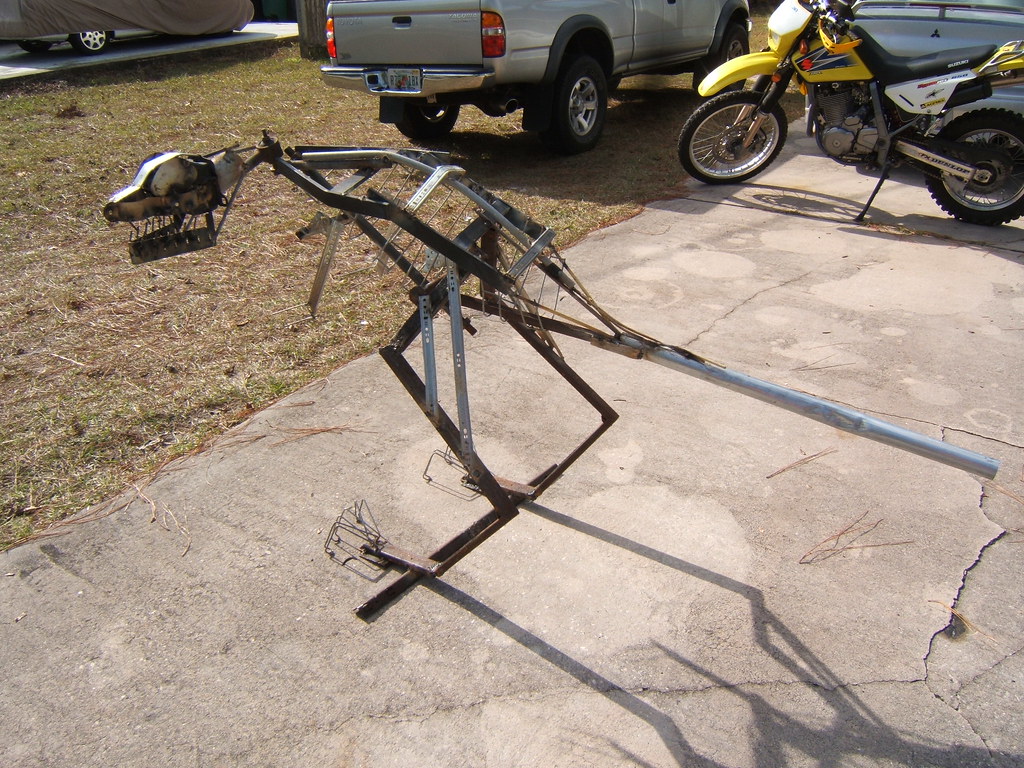
A couple months ago I'd done some horse-trading with someone for a 110cc Chinese dirt bike and a lot of extra parts. It ran fantastically, but was pretty wimpy in the slowing down department. The old owner had plenty of brake gear to be cobbled together, but hadn't gotten around to putting it all together, so I did. I ground the caliper mount off of the stock small swing arm and welded it an a piece of angle iron into place on the nicer swing arm. I also had to put the brake rotor on, requiring some fastener scavenging from the extra parts bin as well, which also required me to put a bottl
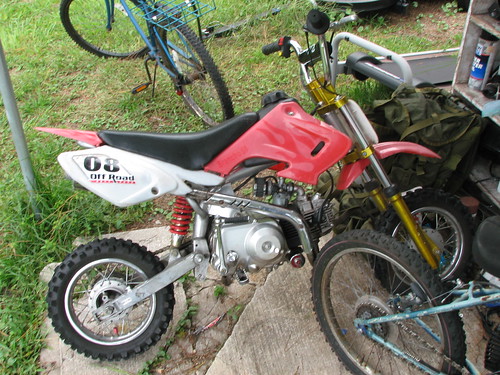
e jack in the swing arm to stretch it wide enough to fit the rear wheel back in after prying it out. Unfortunately, after a quick spray of paint and a few days of work, someone stole the bike right out of my back yard along with a Honda XR70 I was rebuilding the motor for from the extra two motors I was given for my brother and nephew, so I never got to properly bleed and test the lines. I had big plans for franken-bikng a scooter front end and the pit bike's back end together for a pretty funky little ride. Whoever stole it better hope I don't catch them.
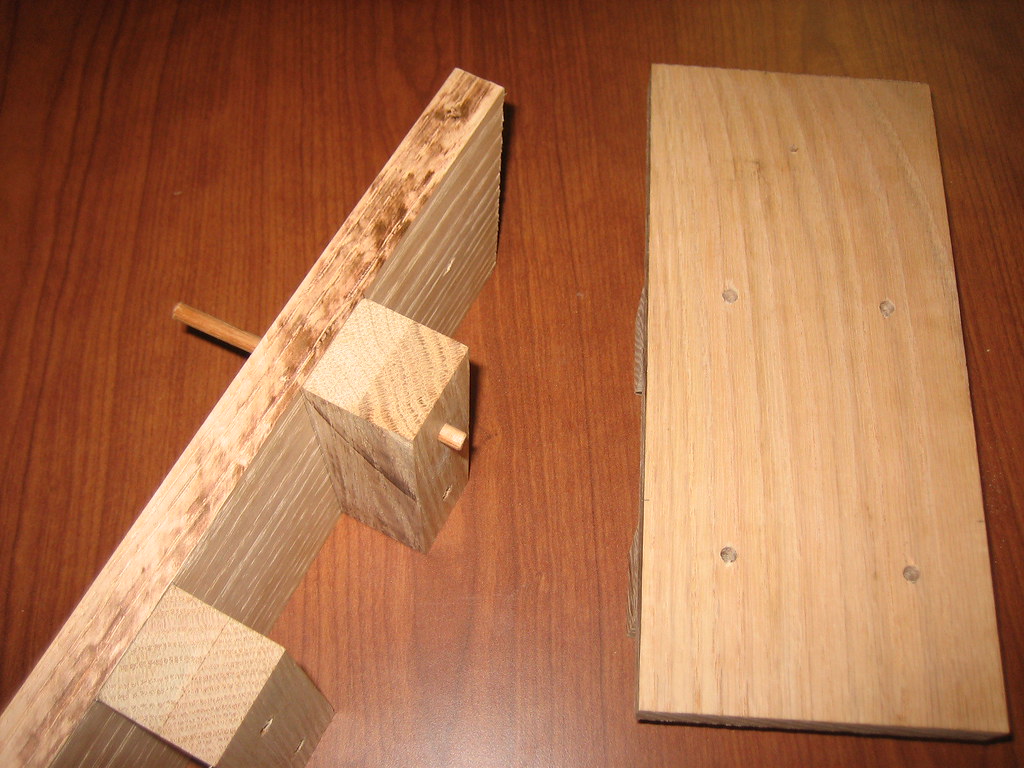
RABBIT HOUSE!:
The old rabbit pen has seen better days, and was probably more a danger to the rabbits than their escaping it's confines, so I decided it was time to rebuild it with some nicer materials. I w
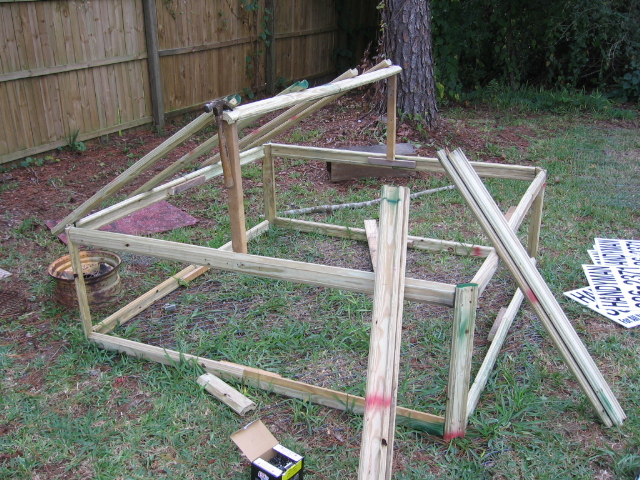
ent to [home improvement gigantorium] and found that they'd left me some slightly warped porch railing for 51c per ~4ft piece. Add to that a bucket of oops isle grey and a couple boxes of nails and I was all set. The pen is almost the same dimensions as the old one, about 6'x6'.

The old cage material was reused, as were a few of the 2x2s and the chain link bottom of the cage. The frame went 
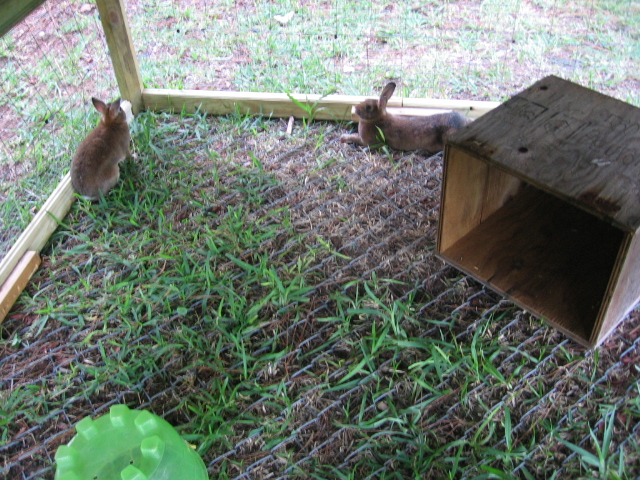
together pretty easily, and with some scabbed together pieces the ~4' rails spanned the 6' width of the cage nicely. for the roof beam I bolted tow pieces together with a red oak scab and shingled the whole thing with corrugated plastic signs that were in a neighbor's recycle bin. I accidently made the design capable of still watering the grass in the pen (as well as any rabbits that may be within it) by laying the shingles down from the top working my way down rather than from bottom to top. Ohh well, the rabbit's don't go out when it's rainy anyway.

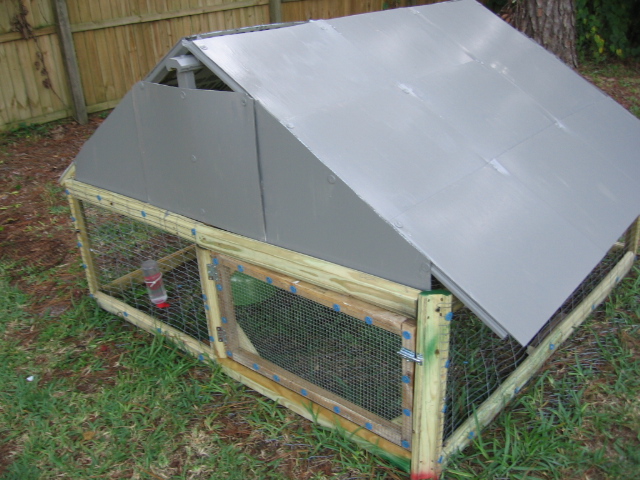
The door is made of the frame of my homemade rabbit pen's bottom since the pen has been replaced lately, and a couple of small eye bolts, a 2" bolt, and a nut make a latch on the inside to let you go in without fear of the door swinging open. This would undoubtedly leave the neighborhood flooding in 3' of rabbits.

Music-upon-opening Ammo Can:
I
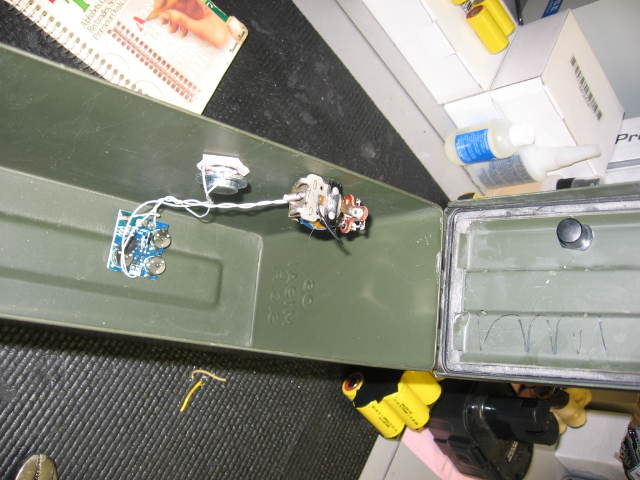
've been wanting to plant a Geocache somewhere for some time, but not wanting to just plant any boring ammo can in an out of the way place, I decided to make it so when it's opened it'll play some music. I had just such a birthday card laying around from last year, so I gutted the card of it's speaker and circuit board, soldered the contact points for the card's switch to the points on an old telco relay which had a nice leaf switch to it. This was all then glued into the side of a normal ammo can with a large plastic nub to hold the relay switch open when the can't closed. The small speaker vibrating with the whole side of the can as it's speaker "cone" really lets it get loud.
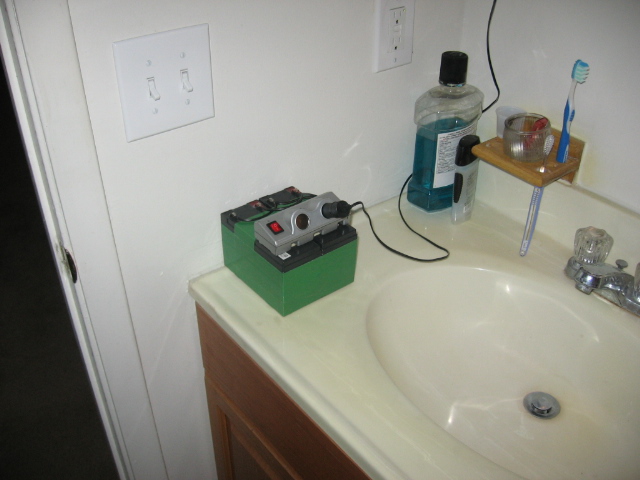
Super Spotlight:
My new (and hopefully permanent for some time to come) job is working retail and tech work for Batteries Plus here in town. This has already afforded me a couple good opportunities to snag some st
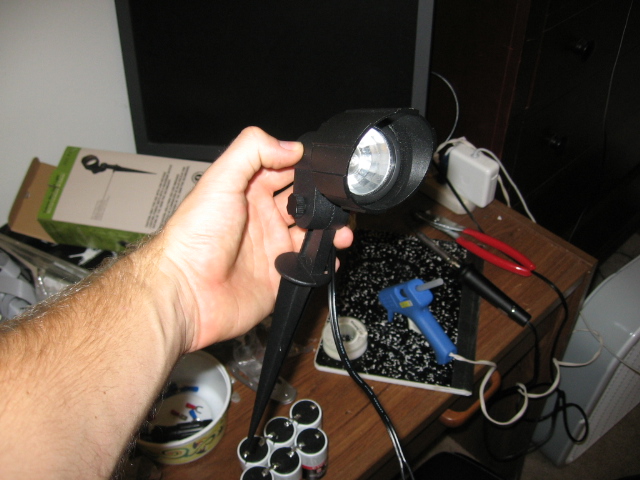
ill functional batteries which would otherwise have been discarded. One such set was 6 lead acid batteries around the size of D cells. I decided that together they would make a great flood light power source, so I put them together and shrink wrapped the whole thing for a nice 12v, 2.5AH battery. To give it something to power I got a $10 12v, 20W garden spot light from [the large construction supply house which shall remain nameless to protect the accused] and proceeded to cut the spiked bottom off of it. The two together will run for around an hour before the light is noticably more dim and the working voltage starts to get kinda puny. Cool thing is it's as bright as a car's headlight, so I might mount it to my bike some how or maybe I'll just come up with a nice casing for it all that won't melt from the lamp's heat.

Toga:
I did manage to find myself at a toga party for my roommate's friend, but finding ourselves short on ancient grec0-roman attire, we went to the store and each got 6 yards of cloth. I got a nice dark orange. It's pretty easy to do, just sling it around your waist, throw it over your shoulder, and tie off any extra like a belt to keep the whole thing in place. Feel free to play where's Waldo with me in that photo.


Hammock:

With all that's been going on I've been needing somewhere to relax. The evenings are getting just about bearable, and with a few days of nice cold snap I decided to repurpose my toga as a hammock. Two pieces of rope with loops on the end knots tied in the ends of the orange cloth and I was all set. I've since replaced the orange cloth with some nice flannel since it's stretchier, softer, and stronger. I just slip the knots out of the ends and carry the cloth inside when I'm done so I don't have to worry about a wet butt when I go out to read or chill out.

Sunday, June 21, 2009

I Made Meatloaf Cupcakes


I like meatloaf. I like cupcakes. I'm not sure where I got the idea, but making cupcakes from meatloaf sounded good to me. They're easy enough to make. Just mix meatloaf mix with ground beef, mold it into a cupcake pan, and make sure to shape them so that they look like finished, risen cupcakes. Cook it on 450F for 15 minutes and make some mashed potatoes to use as "icing". When they're done be careful not to have a lot of the oil from the meat slosh around.

They probably don't look so great, but they're delicious. Maybe next time they'll look better.

Saturday, June 20, 2009

I Made Counter Space

Since the first time I saw my current house, I've liked with one exception. There's not a lot going on for counter space. There's a decent space between the stove and counter that's a prime spot for some more flat space, but since the place is rented I can't just go attaching things to the wall all willy-nilly. I thought about a table, but there would be a cabinet door blocked off if you put a normal one there. There was only one thing for it, I had to make more room.

After a trip to Indoor Lumber Yards and Conglomerate Hardware Stores Anonymous I had 3 pine 2x4"s and a pine tabletop cut to fit the space betwix the counter and stove. When I got home it was pretty hot (close to 100F in the sun) and I was feeling antsy, so I cut parts to make the table with four legs quickly and went inside to assemble it.

The next day my room mates brought up that our rabbits tend to eat food when given the chance, and that with a table leg in the way their bag of food wasn't too easy to get to. Today I remedied that problem (much to the rabbit's and room mate's appreciation) by taking apart the whole thing, recutting most of the pieces, adding diagnonal braces, and ultimately elimingating the offending leg. It's now got two legs on one side, and the build of a school desk on the other. I also screwed down the top, filled the screw holes with wood putty, and coated the whole top in some olive oil so as to avoid staining so easily.

The whole thing is cheap to make, very sturdy, looks pretty nice, and is really useful. Usually I only manage to get two or three of those.

Also, I have a new Flickr account just for The Stuff I Made. http://www.flickr.com/photos/thestuffimade There are some more photos of this there.

Tuesday, April 14, 2009

I made light (and a ladder)

Electric bills suck. So does wasting power using more light than you need to. I try to light the house by sunlight whenever possible, but when there's a mid-sized planet between the giver of free light and my windows this becomes more difficult. Since I had a few battery and some 12v lights around though I figured all I needed was a solar panel and I could harvest the power of that giant burning gravity well for my nocturnal illumination.

All five dollar words and odd perspective aside though, I've come up with a pretty straightforward solar setup for my bathroom and reading lamp. I have a small 1.5 watt solar panel up on my roof held down with 3m tape with a wire run to my room on the other side of the house held down by duct tape (renting a house makes permanent mounting unideal) Then the wire runs to the charge controller that came with the solar cell into either a 12v car jump start pack or a pack of two 7.2AH lead gel cell batteries in series with a switched car accessory adapter on it. The batteries are manually swapped every other day to keep them well charged.

Then the batteries feed lights. I have a simple 10w 12v car work light in the bathroom and a desk lamp with another 10w 12v light. They're not going to blind anyone, but for reading a book or getting a shower or going to the loo at night they're plenty bright.

Also, I needed a ladder to get up to the roof, but I didn't have one. Having already blown my (nonexistent) budget on the solar panel itself and knowing I don't really need a ladder often I set out to make one. I did have some sisal rope, nails, and some decent sized oak saplings around the house in the woods, so I made a pretty rickety but serviceable ladder from them. I'm hoping once the wood dries and shrinks some I can rebuild it and have it more sturdy than with the current green wood. I'll probably reclaim my lag bolts from my dad at some point to hold it all together as well. I'm still sure OSHA would have a fit even then though.

In the future I'd like to mount a larger 5 watt solar cell on the roof as well since they're only twice the price of a 1.5 watt cell, run the charger to both packs at once, and make the wiring and power switch for the bathroom more cleanly run. It takes 6 2/3 hours to recharge for every hour of use with my current setup. Replacing the lamps with LED lamps or adding a larger solar panel would make that better, but for my current use it's enough.

Saturday, February 28, 2009

I Made a High Security Bunny Pen


My previous rabbit pen was something of a flop. It was made of fencing that had rabbits on the name and in pictures on the package. In a week we lost one rabbit, had one jump out and get caught, and had the rabbits look awfully comfy with jumping "rabbit fence" height stuff. A nice big rabbit pen doesn't do much good when you can't leave the rabbits in it.

Anywhatzit, I took the pen down, cut the wide-spaced parts out, and made a smaller 6'x6' pen with an open side for the cage to sit beside and smaller spacing on the sides. I also put a top on it with paneling and some saplings so they can't get out.

Anyway, unless they start digging out they should be pretty well contained.

(UPDATE)
They tried to dig out. Their escape attempt seemed to be aimed more toward China than outside the pen. The cotton-tailed miners didn't seem fazed by my explaining that digging straight down would only lead to molten rock and eventually the southern part of the Indian Ocean, so I was forced to pull out a piece of chain link fence for a bottom to the pen. They can still sniff and eat the grass through it and can relax on hay I put in there as well. Waskawy wabbits.

Friday, January 9, 2009

I Made Loud Shoes

Ever wondered what the Japanese used for footwear prior to western imperialism brought Adidas to the land of the rising sun? Me neither, but after noticing some odd raised wooden sandals in a couple TV shows worn by characters from such a time I looked into it and discovered "geta". Geta is the name of wooden Japanese sandals which are traditionally made of wood and are raised on two blocks (called teeth or ha). There was a time when the streets of Tokyo would have been alive with the clacking of people doing their thing in these shoes, and there are stores from elders who have fond memories of the din of people walking about in these.

There are tall geta for when it rains, different designs for men and women, and many variations from simple to elegant. I never knew I'd get so interested in a pair of shoes but here I am. I decided that it would be neat to have a custom-made pair of geta and when I stumbled into an online calculator for the measurements you need I printed out my measurements and the printout sat in my school folder for some months. I pulled it out yesterday though and went about getting a pair made.

They're a pretty simple piece of footwear to look at them: flat rectangular sole, two ha and a cloth thong to keep it on your foot. As with many things though the devil's in the details. The distance from the front ha to the tip of the geta gives you the lean your foot needs in stride since the sole doesn't bend with the foot so this measure is important, as is the height of the ha, width, length, and placement of the thong. With normal flip-flops, the thong is placed where the big toe is, but it's in the middle on geta. This lets it shift to the side while walking and keeps the square backs of the shoes from hitting one another with each step.

Anyway, on to the pair I made. They're red oak, cut to size and glued with 1/2" red oak dowel drilled and glued into ha and sole to firmly tie them together. The thong is made of nylon rope core for strength. If I make any more it will be with a 1/2" sole since the 1" red oak sole is much thicker than needed.

I made an instructable detailing the whole build so check it out if you'd like more detail on how to make a pair.

Wednesday, January 7, 2009

I Made a Dinosaur


After getting pretty decent with a welder, and seeing my scrap pile behind the shed grow large enough to support making something interesting, I set about making something from the cornucopia of scrap steel I'd collected.

I had a rough idea of a bipedal dinosaur or dragon in mind, but no specific plan or places for pieces in mind (points for alliteration?). I began with the legs, using the welder to very inefficiently cut the metal that would become the legs, then welded the feet to the base, held the ankle/lower legs in place, and tacked them down. Then I did the same for the femurs. I added the back right over the legs, then worked on the basic back outline, adding reinforcements to the tack welds and making sure to keep the whole thing balanced.

Once I had the basic body shape done, I started adding more detail like the ribs, toe claws, and leg pieces. To shape the curve of the tail, spine, and other larger parts, I simply beat dents into strategic parts of the piece, then hit it on a tree to get the curve I needed, which wasn't a very forgiving process on the hands even in welding gloves. While doing all the welding and grinding on paint and rust I got plenty of odd and scared looks from the rabbits in their pen.

I then needed to decide how to make the head and whether to make a dragon's wings or a dinosaur's arms. Since my stockpile was getting somewhat puny I decided to go for the latter, using drawer rails with locking latches to give the arms some range of motion. Then I began working on the head.

The head consists of some steering linkage, a bumper mount from, a rack-mountable spacer for the lower jaw, pieces from a lawn-ornament of a happy little man that had wound up on my neighbor's trash, and some political sign supports for teeth along with other bits of scrap. The tilt of the piece the head bolts to makes it lean to the left, which looks good with the rest of the t-rex's posture. After riding around for a couple days with it strapped into the bed of my truck I'm not sure what to do with it, so it stands guard at the front door for now.

EDIT 4-17-10:
Since making him, the steel dinosaur has seen music and art, and has also had a few color changes. Daniel and the guys of the band Anderdown (of which I was part at the time) brought "ROFL-saurus" to a show at Jacksonville's downtown art walk when we played. ROFL-saurus may have gotten more compliments than the music.

Some time after that I painted him brown and black to keep him from rusting too badly, but when Halloween came along I decided it was time for a more seasonal color. BRIGHT ORANGE! He had a few problems with the toes being too thin and breaking off, so recently as I was working on the archer my friend Barbara brought me some railroad spikes and tie plates. The spikes worked out great for new super-sturdy toes and with a fresh lick of orange pain to match things up ROFL-saurus is gracing the front yard, being stalked by the ever-steady aim of the archer and getting funny looks from the neighbors. Barbara was even awesome enough to come take and put together some nicely backdropped photos photos of the archer and dinosaur.